What Is It?
The Digital Workforce is a team of AI agents built to help your agency with its daily tasks. Each agent is instructed with certain skills and tools that are provided to it, and it uses them to perform its tasks. You can think of these agents as robots that work for you at your agency.
You don't start from zero. InsuranceAgency.ai provides pre-made agents, so you have them from the very first day. And if you need something different, you can also create your own agents.
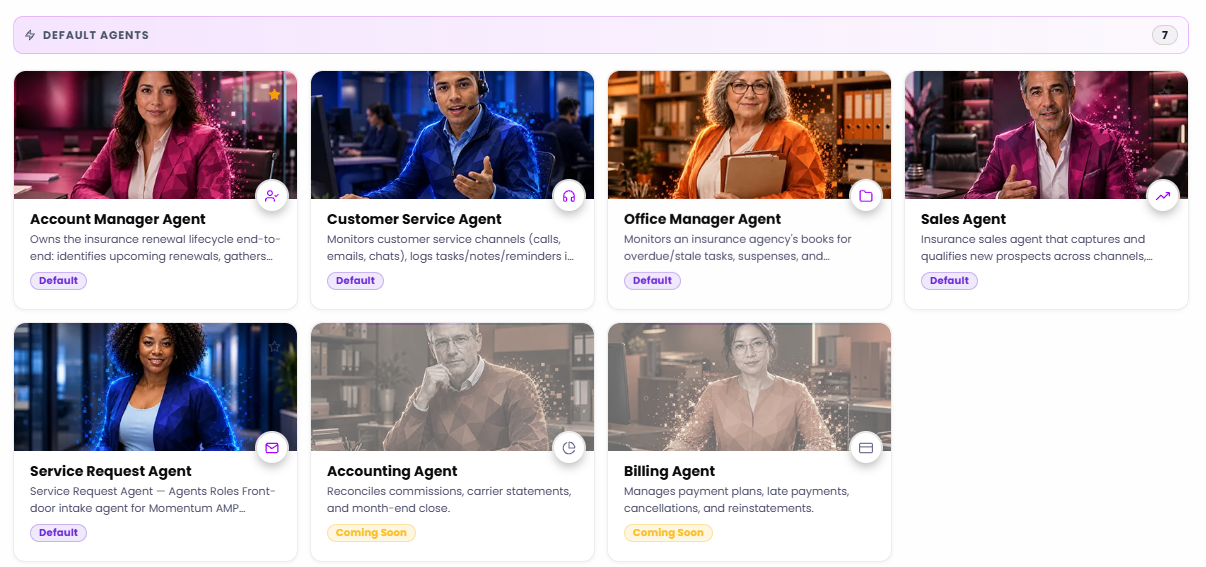
The Digital Workforce, with its pre-made agents.
How This Saves You Time
Your agents are ready from the start. The pre-made agents come with their skills and tools already in place, so there's nothing to build before you get help with daily tasks.
One dashboard shows the whole picture: how many agents you have, the commands they're working on, and the routines they're assigned to.
You can pick a primary agent with a single click on a star, so your favorite agent is the one that's defaulted to you every time.
Each agent can be assigned to commands and routines, and you can chat with it directly from its own page.
Skills are pre-made. You assign the one you need to an agent instead of writing it yourself.
Memory means you teach an agent once. If you always want it to CC your assistant on client emails, you tell it one time and save.
Why This Matters
Agencies handle a lot of repeated work, from renewals to service requests, quoting, and billing. The Digital Workforce gives that work a set of AI agents that are already set up, instead of a blank page.
And because you can teach them your own rules, they get closer to the way your agency does things.
How It Works, Step by Step
Step 1: Open the Digital Workforce
In the left sidebar, open Workspaces, then Management Center, and select Digital Workforce.
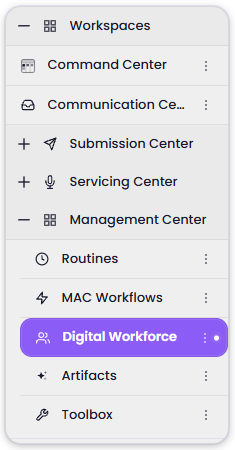
Workspaces, then Management Center, then Digital Workforce.
At the top right of the page you'll find two buttons: Agent Dashboard and New Agent. New Agent is how you create your own agent, which is covered in a separate article.

Agent Dashboard and New Agent, at the top right.
Step 2: Meet the pre-made agents
The page opens with your Default Agents, the pre-made ones you have at the very first. Here is what each card says it does:
Account Manager Agent: owns the insurance renewal lifecycle end to end. It identifies upcoming renewals, gathers and updates exposure and underwriting data, performs renewal comparisons and remarket recommendations, coordinates with carrier downloader and billing functions to confirm terms, and escalates at-risk accounts for retention outreach.
Customer Service Agent: monitors customer service channels (calls, emails, and chats) and logs tasks, notes, and reminders.
Office Manager Agent: monitors the agency's books for overdue or stale tasks and suspenses.
Rate Quoting Agent: a dedicated agent for personal auto and homeowners quoting through Momentum Rate. It is system-managed.
Sales Agent: an insurance sales agent that captures and qualifies new prospects across channels.
Service Request Agent: the front-door intake agent.
Accounting Agent: reconciles commissions, carrier statements, and month-end close.
Billing Agent: manages payment plans, late payments, cancellations, and reinstatements.
Any agents you create yourself show up below, under My Agents.
Step 3: Read the dashboard
On the right side of the page, you'll see a dashboard with a summary of the actions and the number of agents you have.
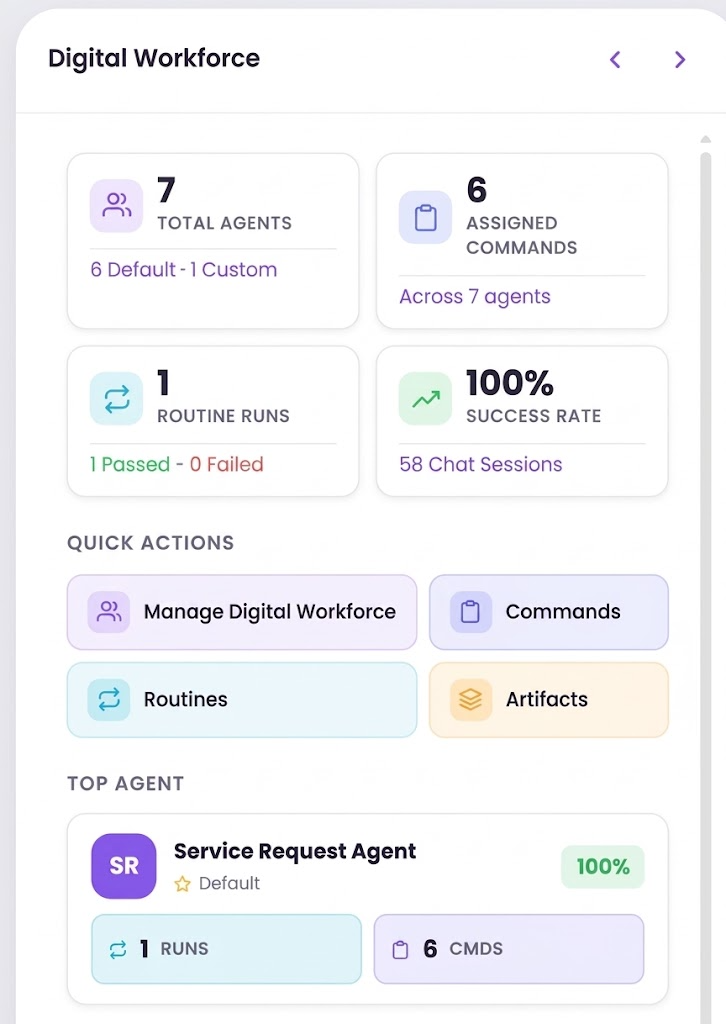
The Digital Workforce dashboard.
Total Agents is how many agents you have, split between default and custom.
Assigned Commands counts all the commands those agents are working on.
Routine Runs shows the routines those agents are assigned to, along with how many passed or failed. A success rate and the number of chat sessions appear alongside.
Quick Actions are shortcuts: Manage Digital Workforce, Commands, Routines, and Artifacts.
Top Agent is the agent that is defaulted to you, shown with its number of runs and commands.
Step 4: Choose your primary agent
You can default any of the agents so it becomes your defaulted agent every time. Just click the star icon on the agent's card, and that agent is set as your primary agent.
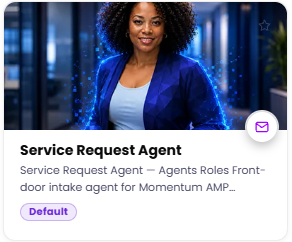
The star on an agent's card marks your primary agent.
Below the Top Agent, the dashboard also keeps the history of your recent activity. You can filter it by All, Commands, Runs, or Chats.

Recent Activity, with its filters.
Step 5: Open an agent and check its activity
You can go inside any of the agents. The first tab, Activity, shows the commands assigned to that agent, the routines assigned to it, and the chat history, with a date range you can adjust.

An agent's page: its tabs, the Start Chat and Set as Primary buttons, and its Activity view.
From here, you can assign this agent to a command, or to a routine. You can also start chatting with the agent, going back and forth with it, just by clicking Start Chat. It works like chatting with a general AI assistant, but specialized in insurance. You'll also see a Set as Primary button next to it.
Step 6: Review the Overview
Next, the Overview tab. This is the description, the name of the agent, and the model it's using, along with some other important information.

The Overview tab: name, model, and description.
Step 7: Look at its skills
Open the skills.md tab to see the skills the agent includes. The skills assigned to this agent appear under Assigned.
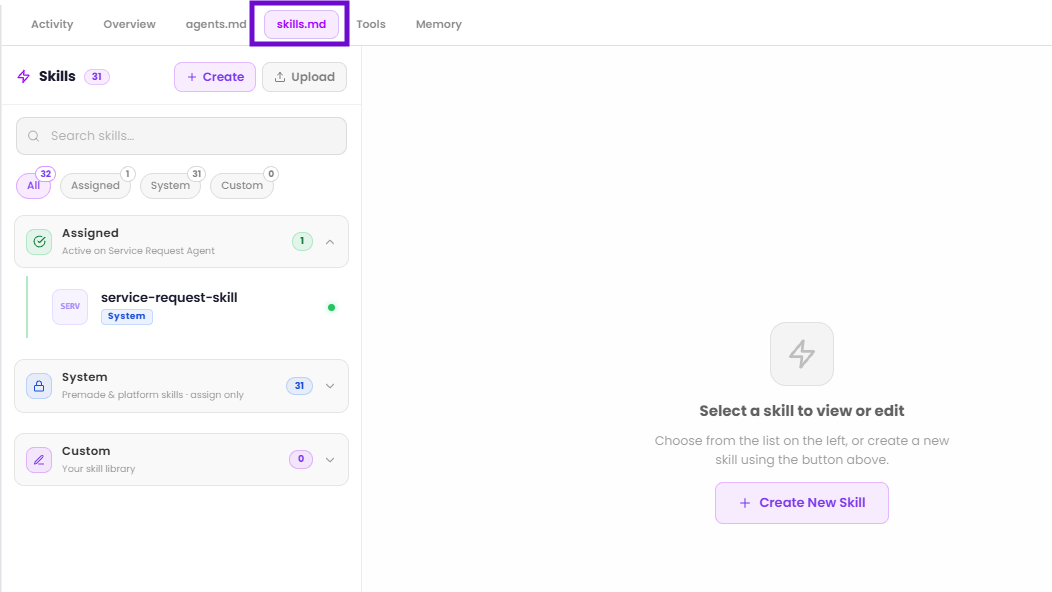
The Skills panel: Assigned, System, and Custom.
InsuranceAgency.ai has 30 pre-made skills for you, which you'll find under System. You can assign a specific skill to the agent. When you select a pre-made skill, you can assign it to that agent or unassign it, but its prompt content is hidden and can't be viewed or updated.
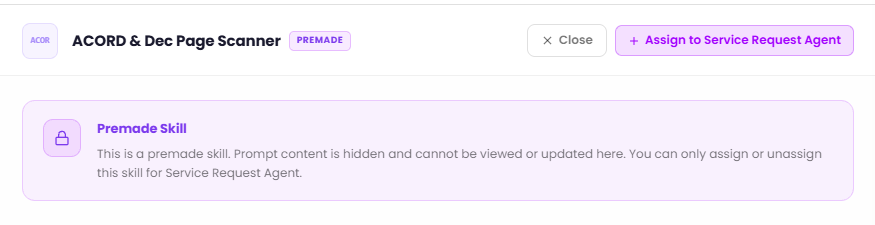
A pre-made skill, with the option to assign it to the agent.
You can also create your own skill. Just hit Create, give the skill a name, and then write the skill itself in the editor.

Create and Upload, at the top of the Skills panel.
Step 8: Check its tools
Then open the Tools tab. These are the endpoints the agent uses to perform its tasks, and they come from our MCP.
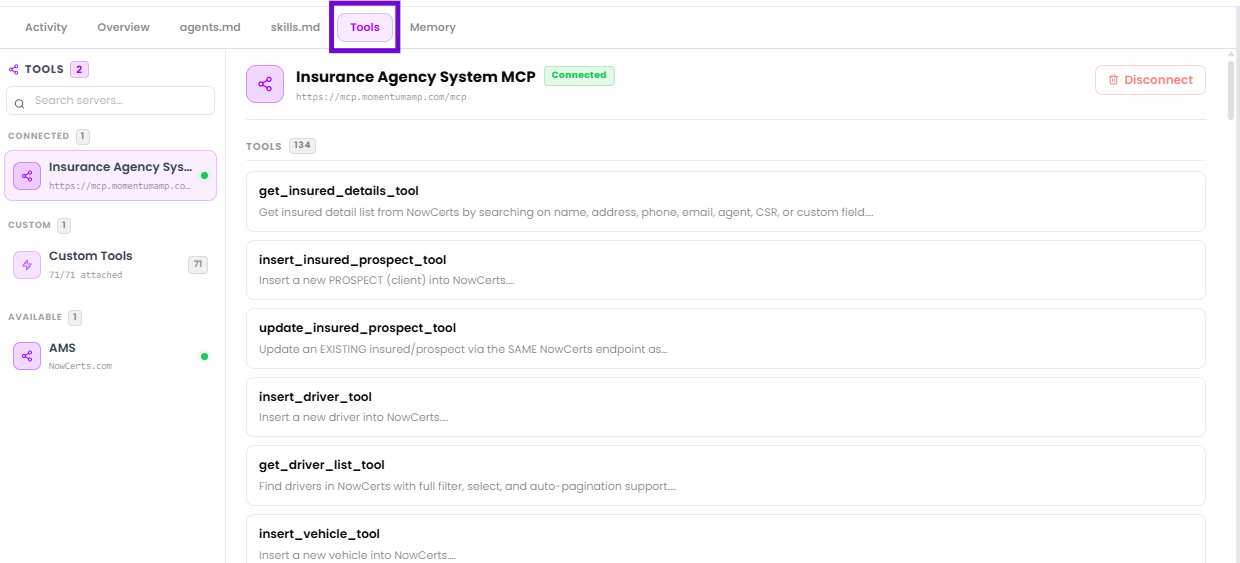
The Tools tab: the connected MCP and its list of tools.
Step 9: Teach it with Memory
Finally, open the Memory tab. This is really important, because here you'll see the Learned Rules that the agent has learned.
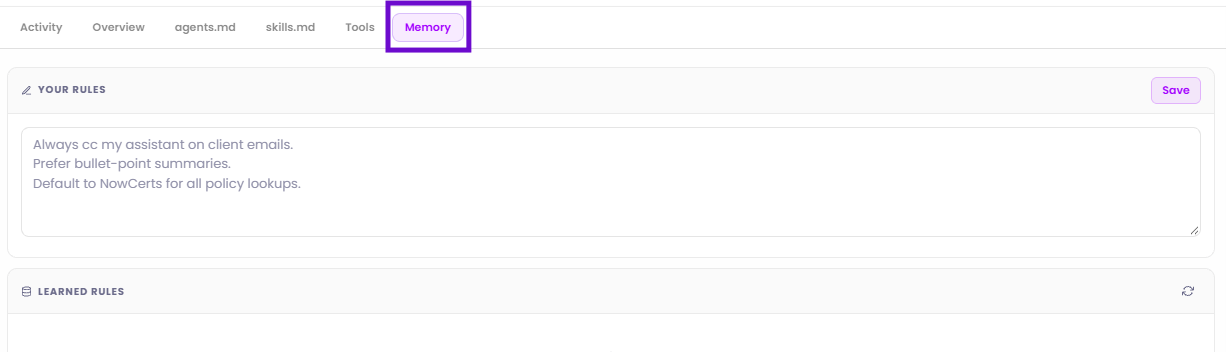
The Memory tab: Your Rules at the top, and the Learned Rules the agent has picked up.
You can also teach it yourself, or update its memory, which means you can instruct it again. In Your Rules, write what you want. For example, you can tell it that you always want it to CC your assistant on client emails. Then hit Save, and that's it.
Conclusion
The Digital Workforce gives your agency a team of AI agents that is ready from the first day: pre-made agents, with skills and tools already in place, that you can assign to commands and routines or chat with directly.
From each agent's page, you can see its activity, review its overview, assign or create skills, check its tools, and keep teaching it through memory. And if you ever need an agent that doesn't exist yet, you can create your own.
Questions? Reach out to your Momentum AMP product contact with anything about InsuranceAgency.ai.
This article reflects the Digital Workforce as of this writing.
Was this article helpful?
That’s Great!
Thank you for your feedback
Sorry! We couldn't be helpful
Thank you for your feedback
Feedback sent
We appreciate your effort and will try to fix the article