What Is It?
Connecting your email is a two-part setup that links a real Gmail or Microsoft Exchange mailbox to InsuranceAgency.ai, so incoming emails can show up as tasks in the Command Center instead of sitting only in an inbox.
The two parts live in two different places. The actual account connection, the login that authorizes access to a mailbox, happens in Momentum AMP's Automation Center. Once that's done, InsuranceAgency.ai shows that same mailbox under its own Connected Apps, where you separately control whether AI automation is actually turned on for it.
In other words: Automation Center is where you connect the account. InsuranceAgency.ai is where you decide whether that connected account is live.
How This Saves You Time
Without this connection, every email still lives only in Gmail or Outlook: someone has to read it, decide what it is, and manually create whatever task or record it needs elsewhere. Connecting email removes that manual hand-off entirely.
Incoming emails flow into the Command Center on their own, as soon as they arrive, instead of needing someone to copy information over by hand.
More than one mailbox can be connected at the same time, for example an individual agent's inbox and a shared agency inbox, and each one works independently.
Every connected mailbox is visible in one place, with its status (Active), who it's shared with, and whether AI is currently turned on for it, so there's no guessing which inboxes are actually feeding the system.
Turning a mailbox on or off is a single toggle, not a re-connection, so you can pause automation on one account without touching the others.
Why This Matters
Email features in InsuranceAgency.ai , like Email Categories, can't work until a mailbox is connected. This step comes first.
Most agencies use more than one inbox; personal ones and shared ones, like support. You can connect several at once and see them all in one list. If a shared inbox isn’t connected, the AI never sees what arrives there.
Connecting a mailbox and turning AI on for it are two separate steps. Each mailbox has its own On/Off toggle, so you can connect an inbox, confirm it works, and turn on AI when you’re ready.
How It Works, Step by Step
Step 1: Open the Automation Center from AMS
In AMS, open the MOMENTUM AMP section in the left sidebar. It expands into a list of the connected Momentum products; select Automation Center from that list.
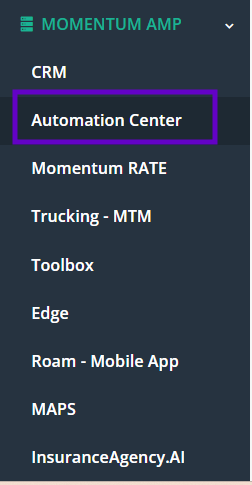
The MOMENTUM AMP menu in AMS, expanded to show Automation Center.
Step 2: Open Email Integrations
Once you're in the Automation Center, click your account name in the top right corner. A menu opens with several options; select Email Integrations.
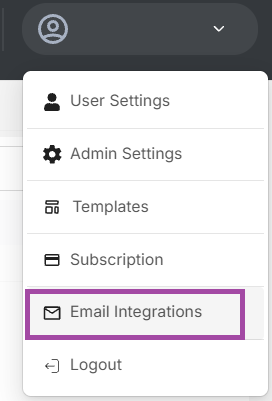
The account menu in Automation Center, with Email Integrations listed.
Step 3: Choose your provider and connect the account
On the Email Integrations page, pick the tab that matches your email provider: Gmail, Microsoft Exchange, or Custom / IMAP. Then click Connect Account (or Connect Other Account if you're adding an additional mailbox alongside ones you've already connected).
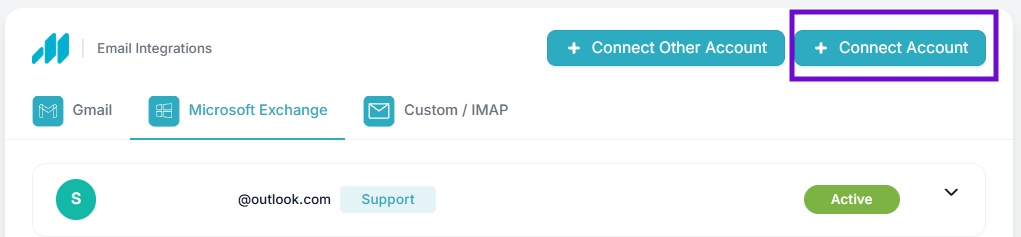
Email Integrations, with the Gmail / Microsoft Exchange / Custom-IMAP tabs and the Connect Account buttons.
Clicking Connect Account opens your provider's own sign-in window. This is the standard Google or Microsoft login screen, so you'll authenticate exactly the way you normally would for that provider.
Step 4: Confirm the account shows Active
Once sign-in completes, you're brought back to Email Integrations, where the account now appears in the list with a green Active status.
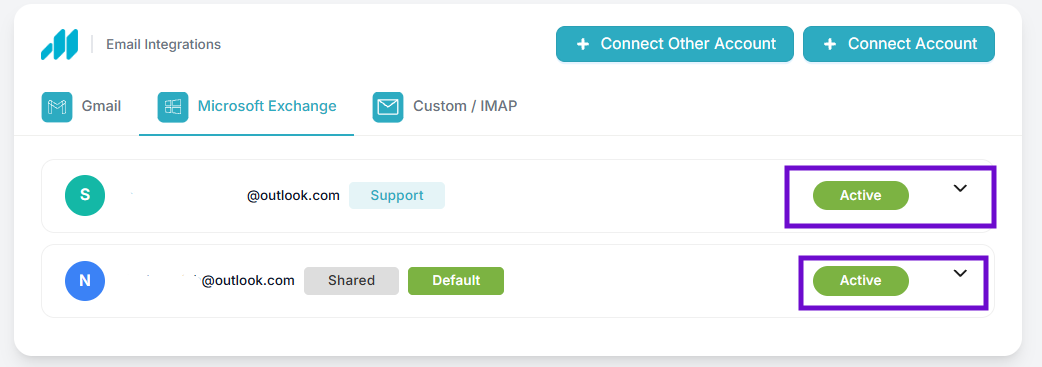
The Active status shown next to a newly connected mailbox.
If you're connecting more than one mailbox, repeat Steps 3 and 4 for each one. Every account you connect this way will appear in the same list, each with its own Active status.
Step 5: Go to Connected Apps in InsuranceAgency.ai
Switch over to InsuranceAgency.ai and open Settings, then Connected Apps (Integrations). Under Momentum Apps, you'll find Momentum email exchange marked Connected, since it picked up the account(s) you just connected in the Automation Center.
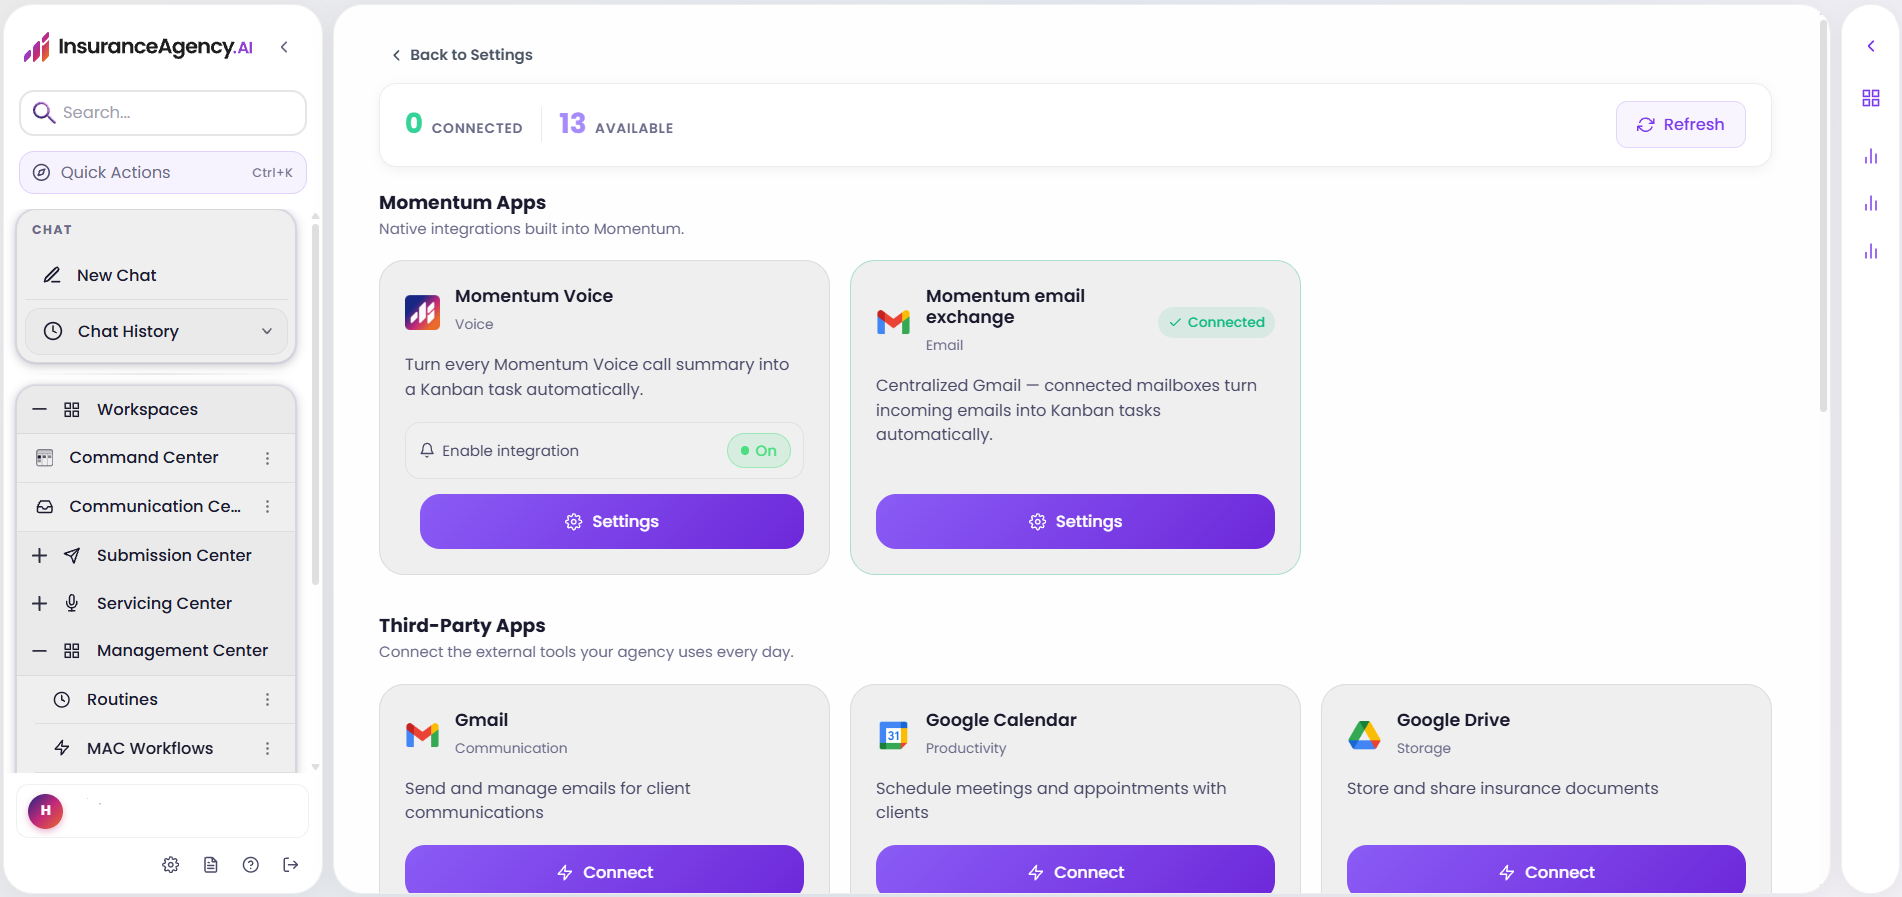
Connected Apps in InsuranceAgency.ai: Momentum email exchange, already marked Connected.
Step 6: Open Momentum email exchange settings
Click Settings on the Momentum email exchange card.
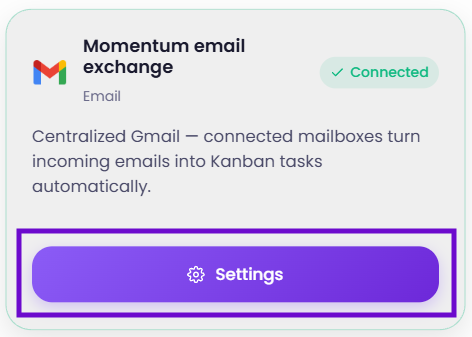
The Momentum email exchange card, with the Settings button that opens its Connected Integrations list.
This opens Connected Integrations: a list of every mailbox connected through the Automation Center, along with a toggle for each one that controls whether AI automation is turned on for it.
Step 7: Turn each mailbox on
For every mailbox you want InsuranceAgency.ai's AI to actually work from, whether that's Categories, the Command Center, or anything else email-based, switch its toggle to On.
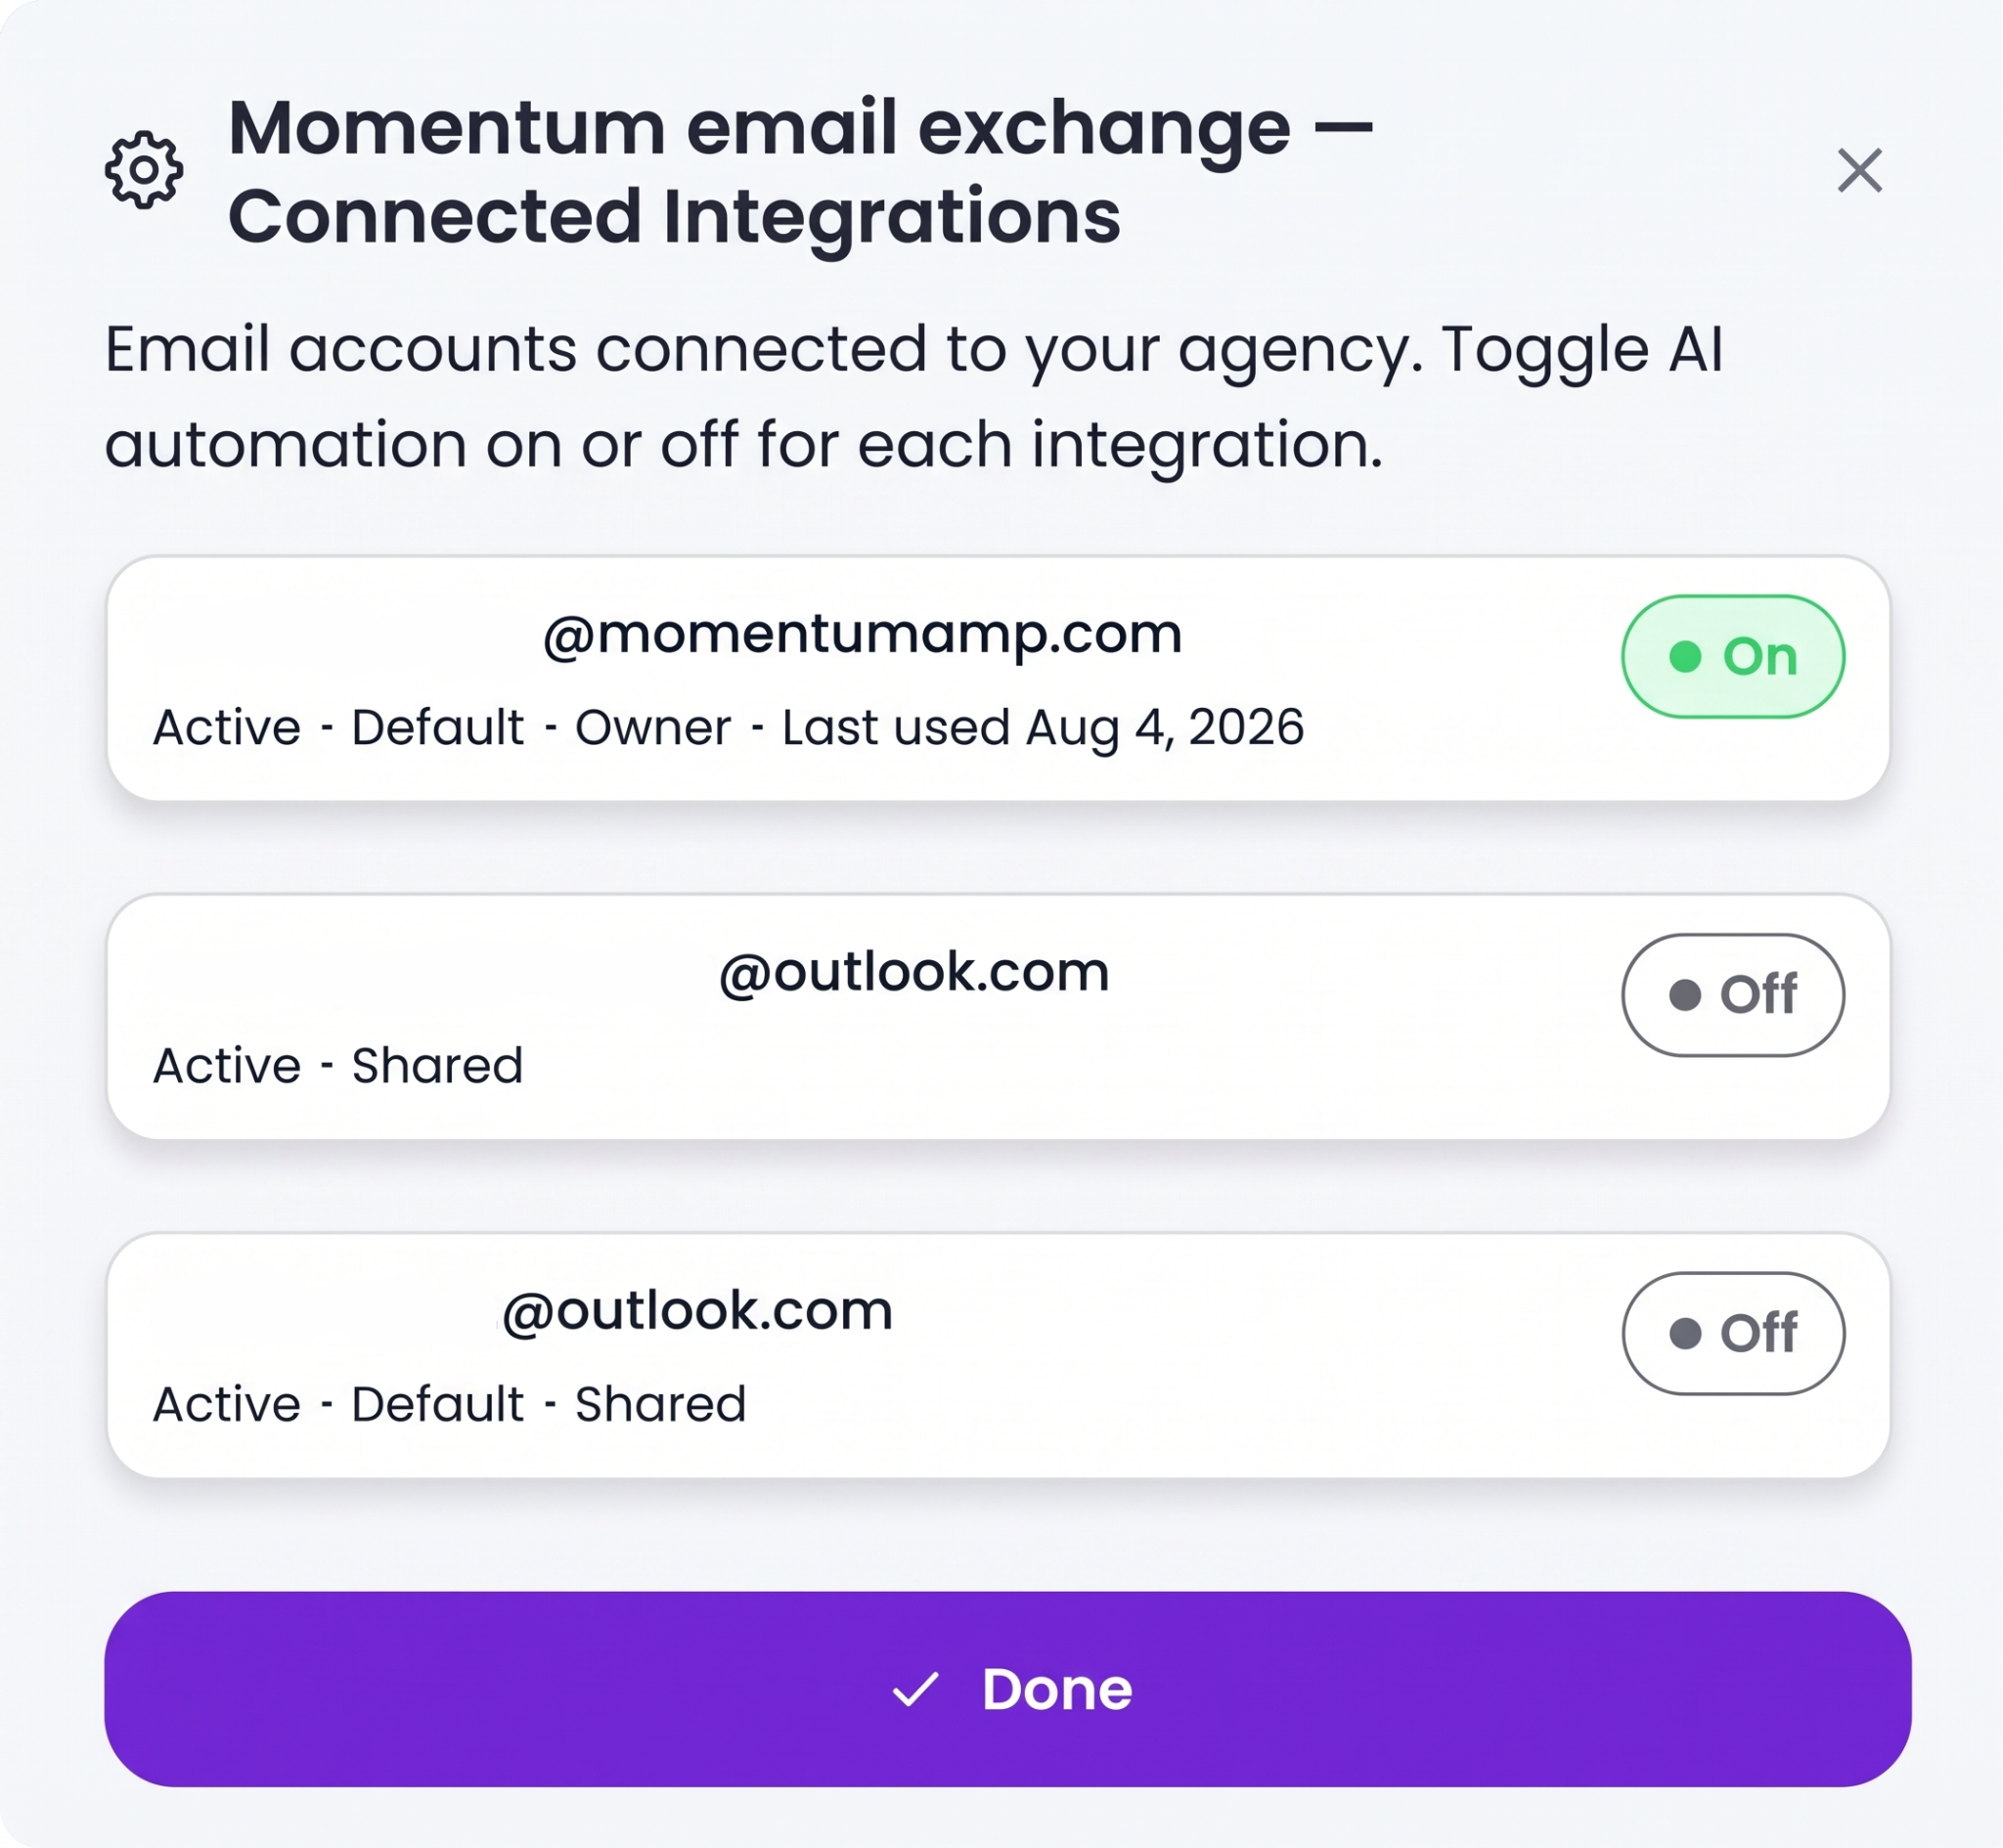
Connected Integrations: each mailbox with its own On/Off toggle, plus details like Default, Owner, and Shared.
Each row also shows useful context: whether the mailbox is marked Default, whether it's Shared, and when it was last used. A mailbox left Off stays connected and Active, but InsuranceAgency.ai simply won't act on anything coming through it until it's switched on. Once you're done, click Done to save.
Conclusion
Connecting email is really two short steps done in two different places: authorize the mailbox once in the Automation Center, then turn it on for InsuranceAgency.ai from Connected Apps. After that, incoming mail from every mailbox you've enabled starts flowing into the Command Center automatically, ready for whatever else you've configured on top of it, like Email Categories, without anyone touching the inbox by hand.
Because connecting and enabling are separate steps, you can add a mailbox ahead of time and decide exactly when AI starts acting on it, and you can connect as many mailboxes, shared or individual, as your agency actually uses.
Questions? Reach out to your Momentum AMP product contact with anything about InsuranceAgency.ai.
This article reflects the email connection workflow as of this writing.
Was this article helpful?
That’s Great!
Thank you for your feedback
Sorry! We couldn't be helpful
Thank you for your feedback
Feedback sent
We appreciate your effort and will try to fix the article