What Is It?
A webhook lets an external application send information to InsuranceAgency.ai on its own. With the webhook that creates a command, whatever the other application sends shows up in your Command Center as a command, and the AI starts working on it immediately.
In InsuranceAgency.ai, webhooks come in two kinds: one for creating a command, and one for triggering a routine. This article covers the one that creates a command, using a form as the example. When someone submits the form, a command is created with that information.
How This Saves You Time
The information gets to InsuranceAgency.ai automatically. Nobody has to copy it over from a form or another application by hand.
The AI starts working on the command right away, as soon as it arrives.
You decide what the AI should do with it, which category it belongs to, and which digital agent takes it, so each kind of submission goes where it should.
You set it up once. After that, every submission creates its own command.
Why This Matters
A lot of information starts outside your management tools: a form, a CRM, another application. A webhook connects those places to InsuranceAgency.ai, so new information doesn't wait for someone to move it.
The exact screens depend on the application you're using, but most of the time the steps are very similar.
How It Works, Step by Step
Step 1: Open Webhooks
Below your profile name in the left sidebar, click the gear icon to open Settings.
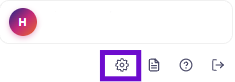
The gear icon, below your profile name.
In Settings, you'll find Webhooks listed with the other quick access options, below Connected Apps. Its description reads: get a secret key to create commands or trigger routines from outside Momentum AMP. Click it.
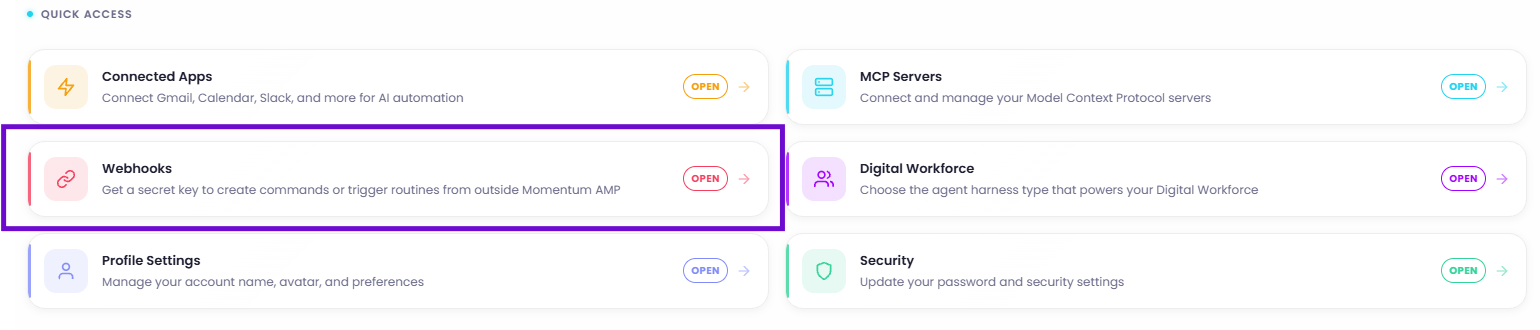
Settings, with Webhooks in Quick Access.
Step 2: Create your secret key
The secret key is the authorization path: it's what tells InsuranceAgency.ai that the information being sent is yours. At the top of the Webhooks page, click Create Key.

The Secret Key section, before a key has been created.
The key is created for you immediately. Save it and keep it somewhere else, because once you refresh the page it will be hidden, for security purposes. The page reminds you of this when the key appears.

The reminder shown when the key is created.
If the key is no longer shown, you can generate a new one by clicking the button with the circular arrows, next to the key.
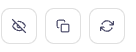
The buttons next to the key. The circular arrows generate a new one.
Step 3: Review what the page gives you
Below the key, the page documents the webhook that creates a command. It shows exactly what you'll need on the other application: the URL, the header where the secret key goes, and the structure of the JSON body. Each one has a copy button next to it.
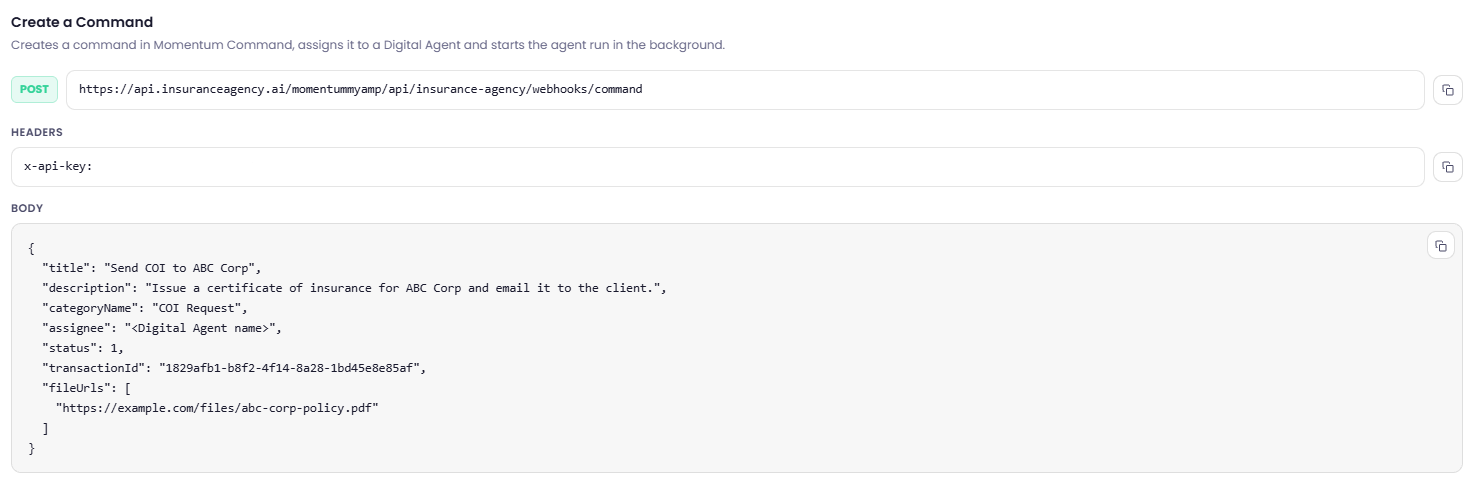
Create a Command: the URL, the header, and the body structure.
The page also describes each item in the body:
title: required. The command title.
description: required. What the Digital Agent should do. This is the instruction the run executes.
categoryName: required. The command category, matched by name (not case-sensitive). Built-in categories are checked first, then your custom SOP categories.
assignee: optional. The name of one of your Digital Agents, who runs the command. If you leave it out, your account's primary Digital Agent is used.
status: optional. 0 is To Do and 1 is In Progress. If you leave it out, the command starts In Progress, because it is assigned to an agent.
transactionId: optional. A dashed GUID (8-4-4-4-12) used as the folder key for the command's documents. Momentum AMP generates one if you don't pass it.
fileUrls: optional. Publicly reachable http(s) URLs of files to attach. Each one is downloaded and stored with the command.
Step 4: Have the source ready
You need an application that will send the information. In this example, it's a simple form with First Name, Last Name, Phone, and Email, on GHL
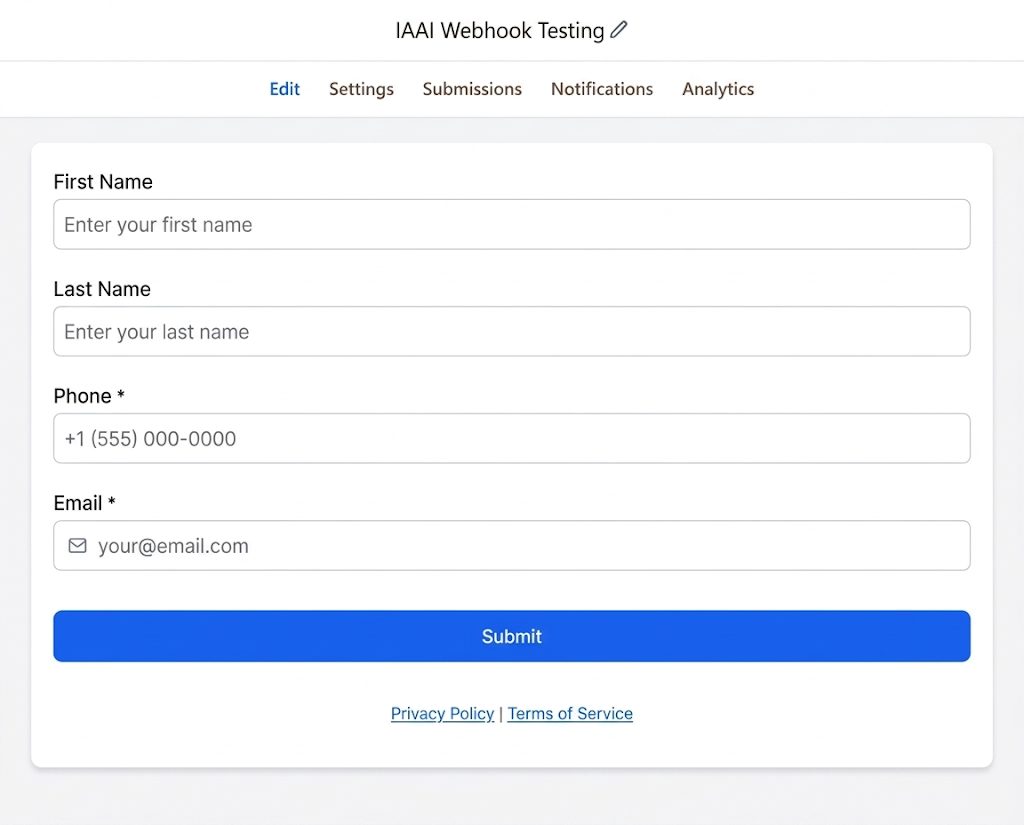
The example form.
Step 5: Create the automation in Momentum CRM
In Momentum CRM, go to the Automations section and create a new automation. For the trigger, choose the form being submitted: whenever someone fills out the form and sends it, the automation runs.
Then add an action that posts the information. In this example, it's the Custom Webhook action, which lets you post information to a URL.
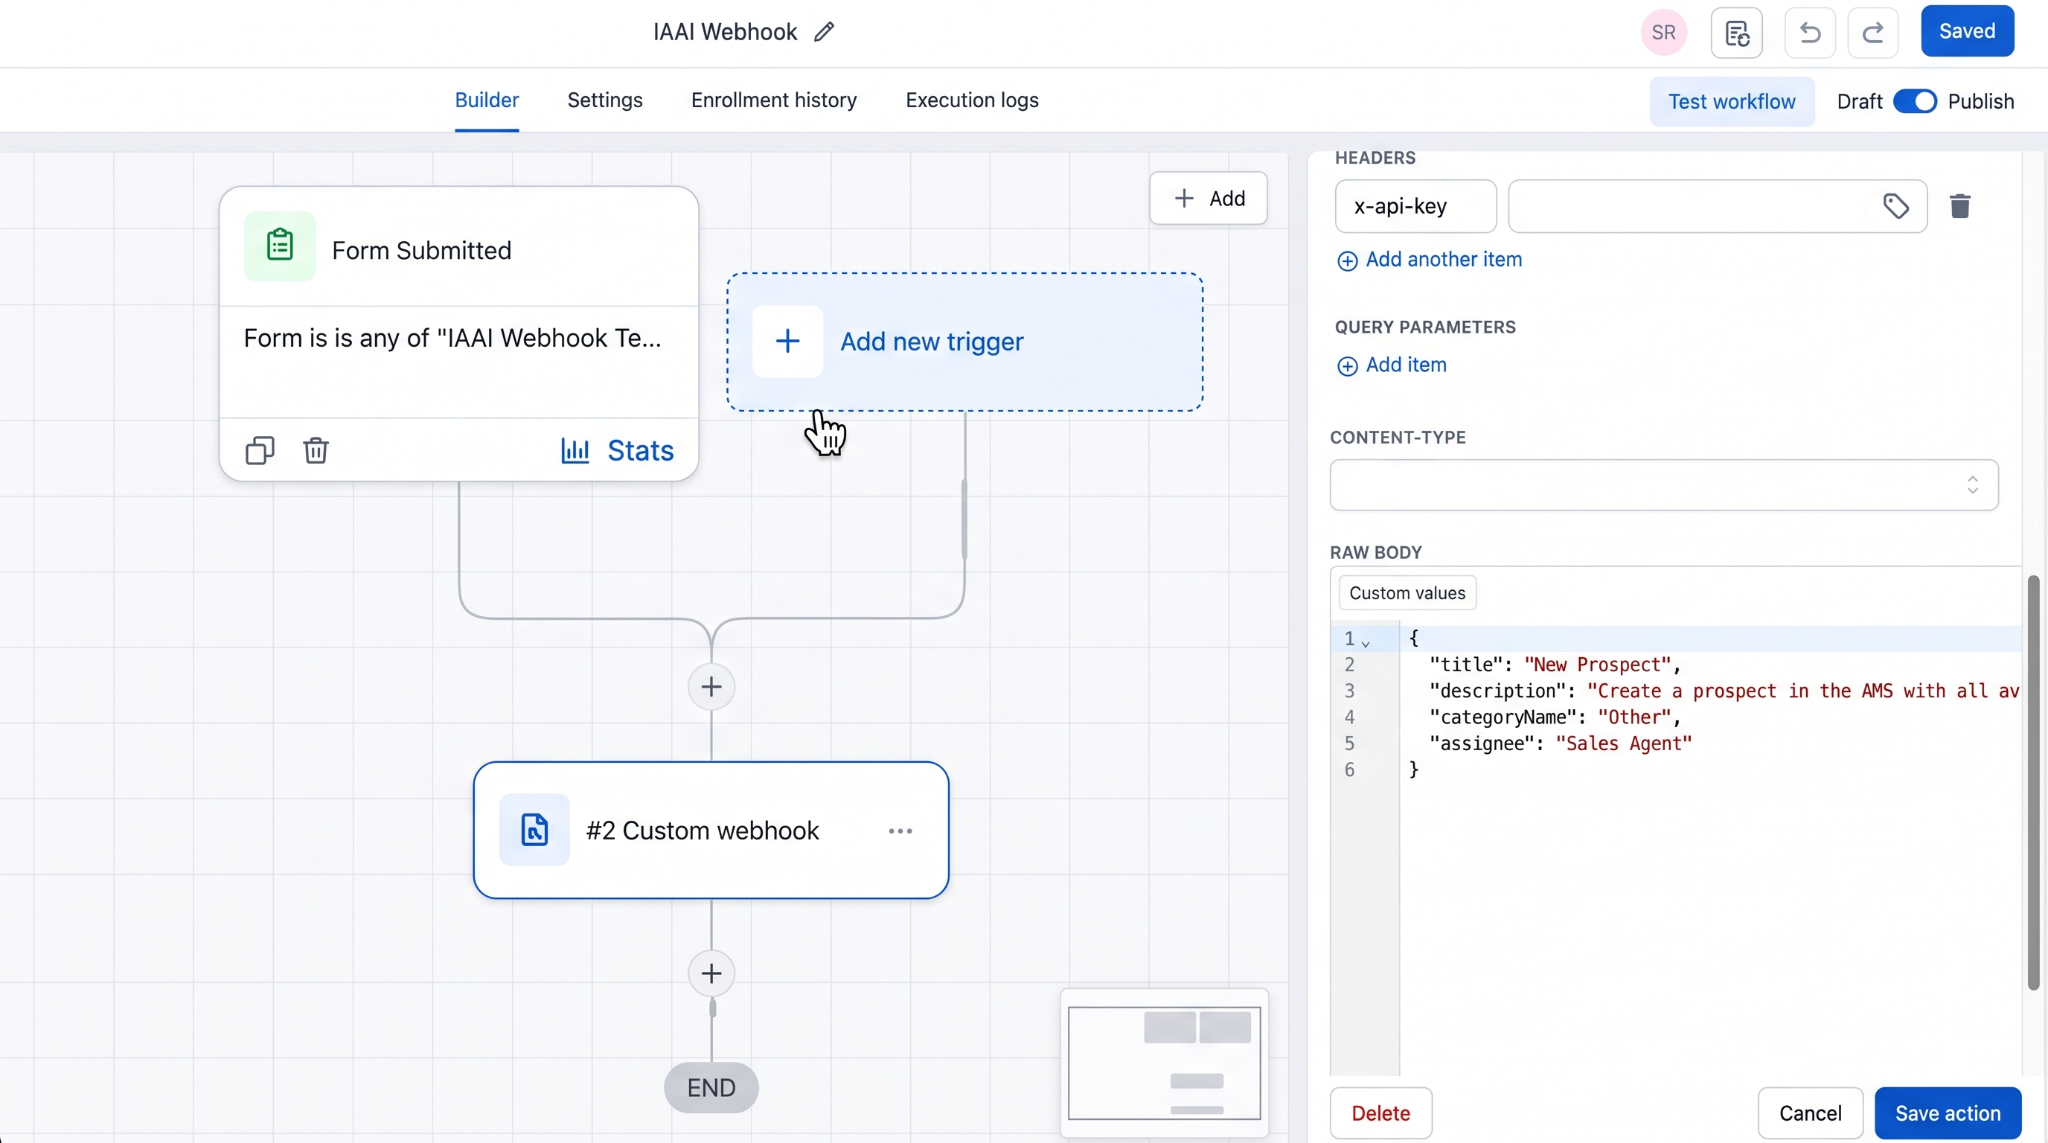
The trigger (Form Submitted) and the Custom Webhook action.
Step 6: Add the URL and the secret key
In the Custom Webhook action, copy the URL from the Webhooks page in InsuranceAgency.ai and paste it where it says URL. The method is POST.
Under Headers, add x-api-key as the header name, and paste the secret key you generated as its value.
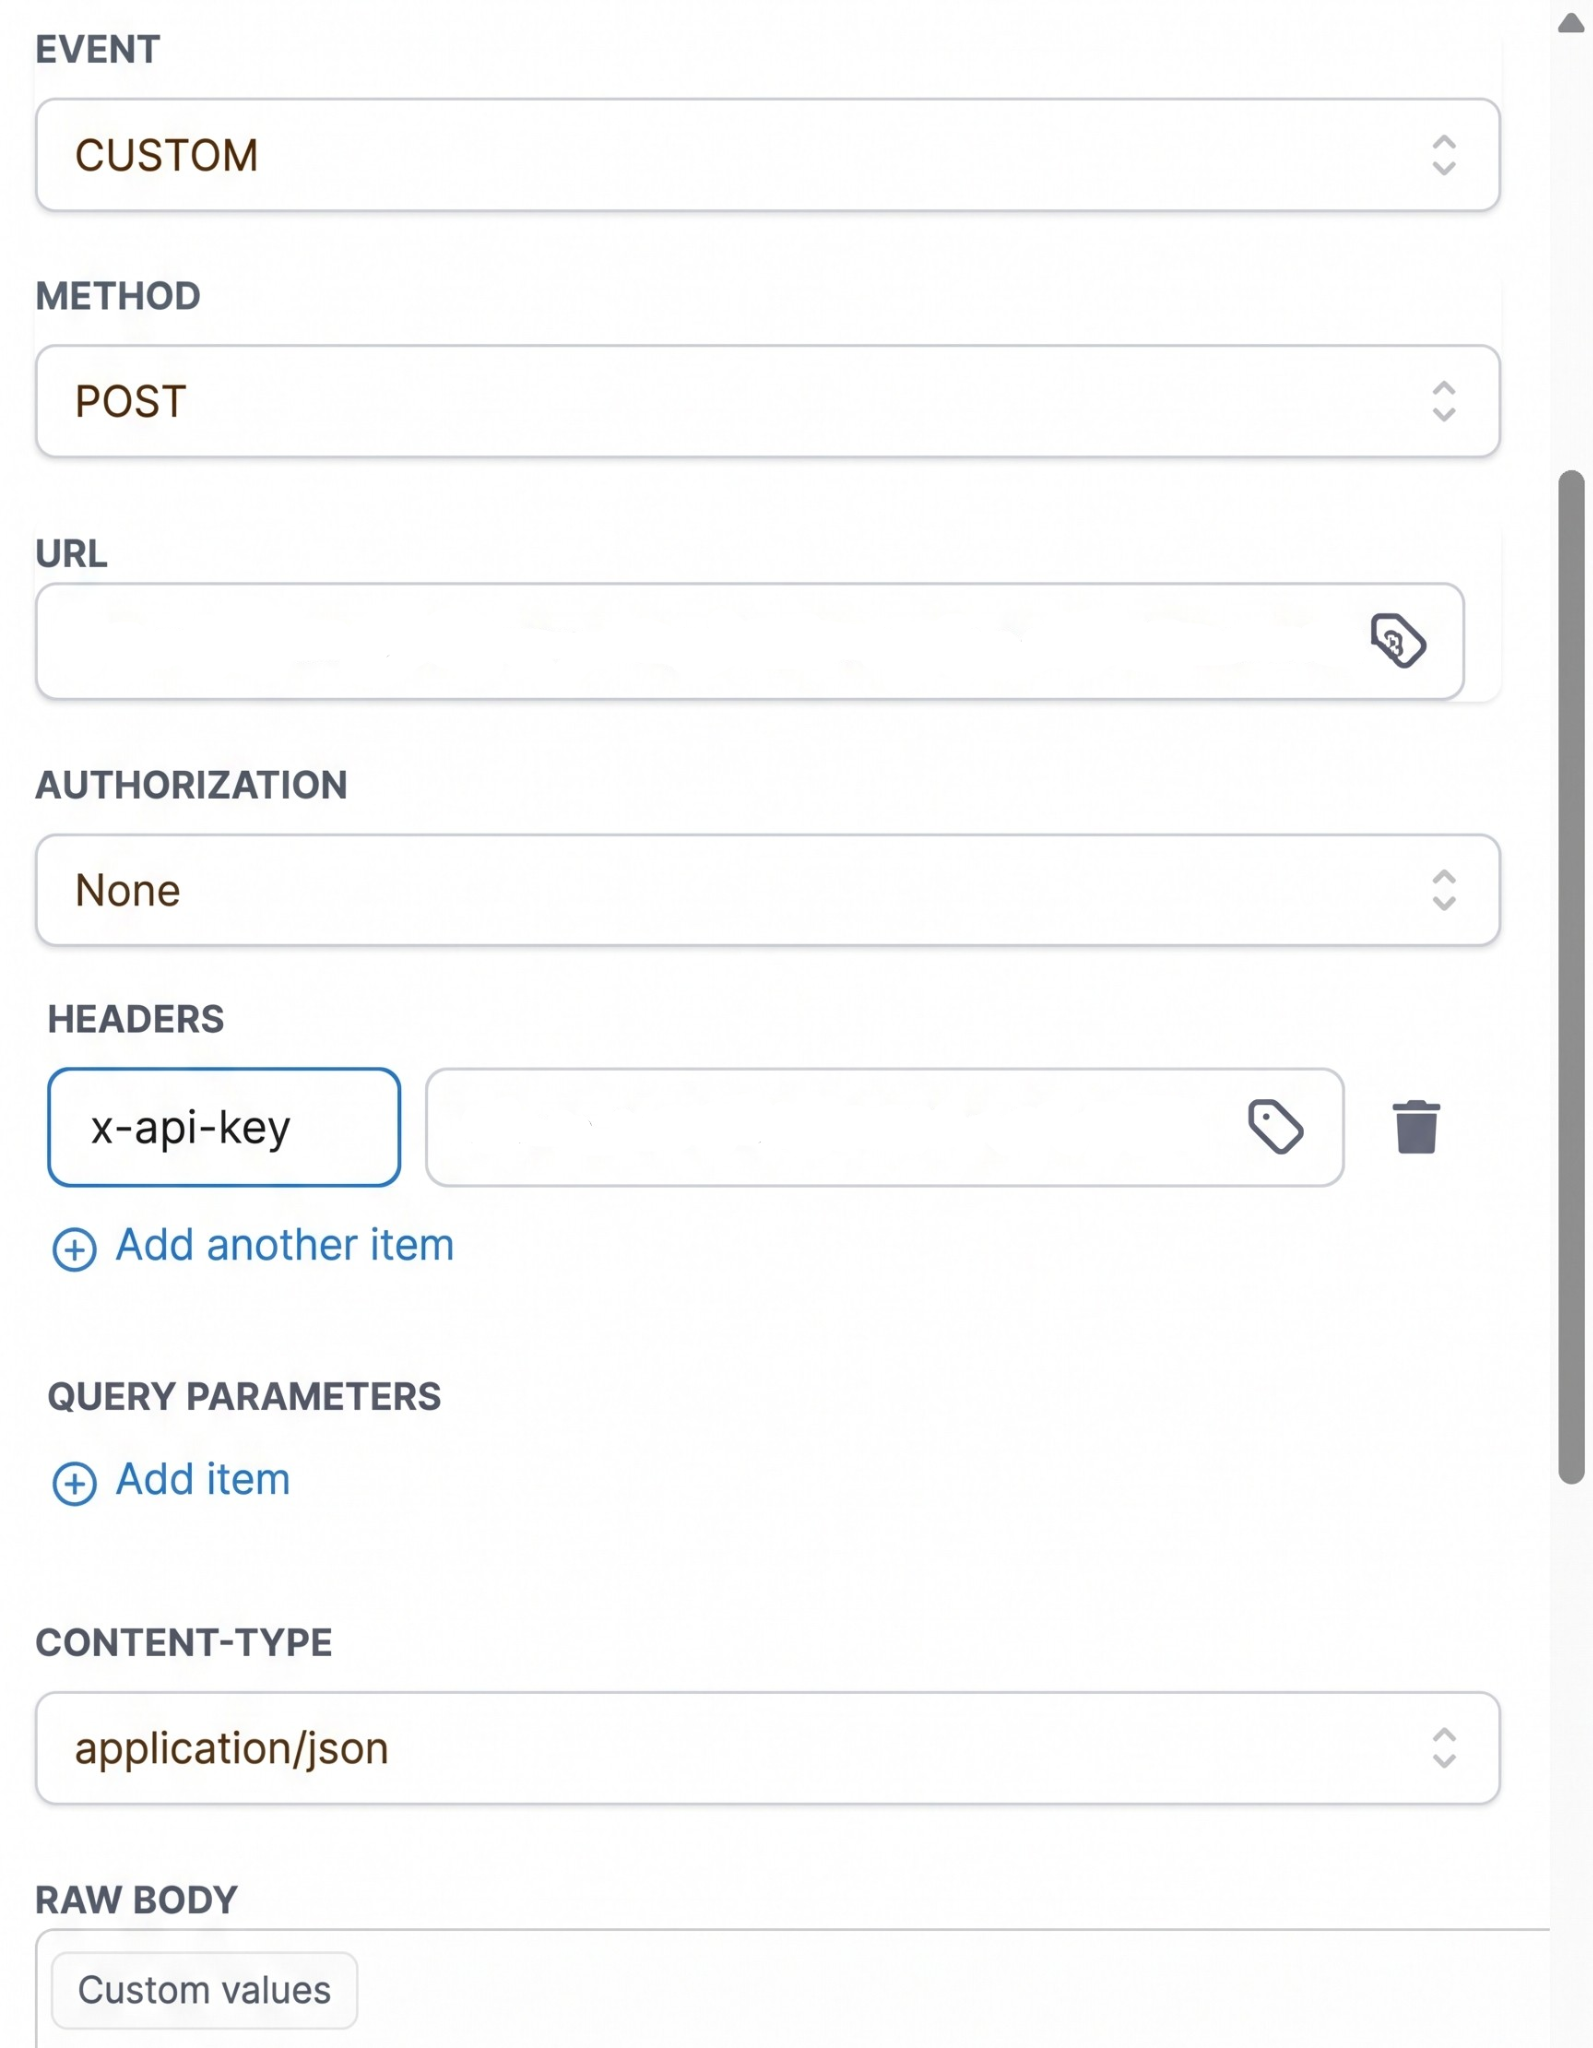
The action's URL and headers. The values are hidden here on purpose.
Step 7: Set the content type and paste the body
Set Content-Type to application/json. In Raw Body, copy the structure from the Webhooks page and fill it in with your own values.
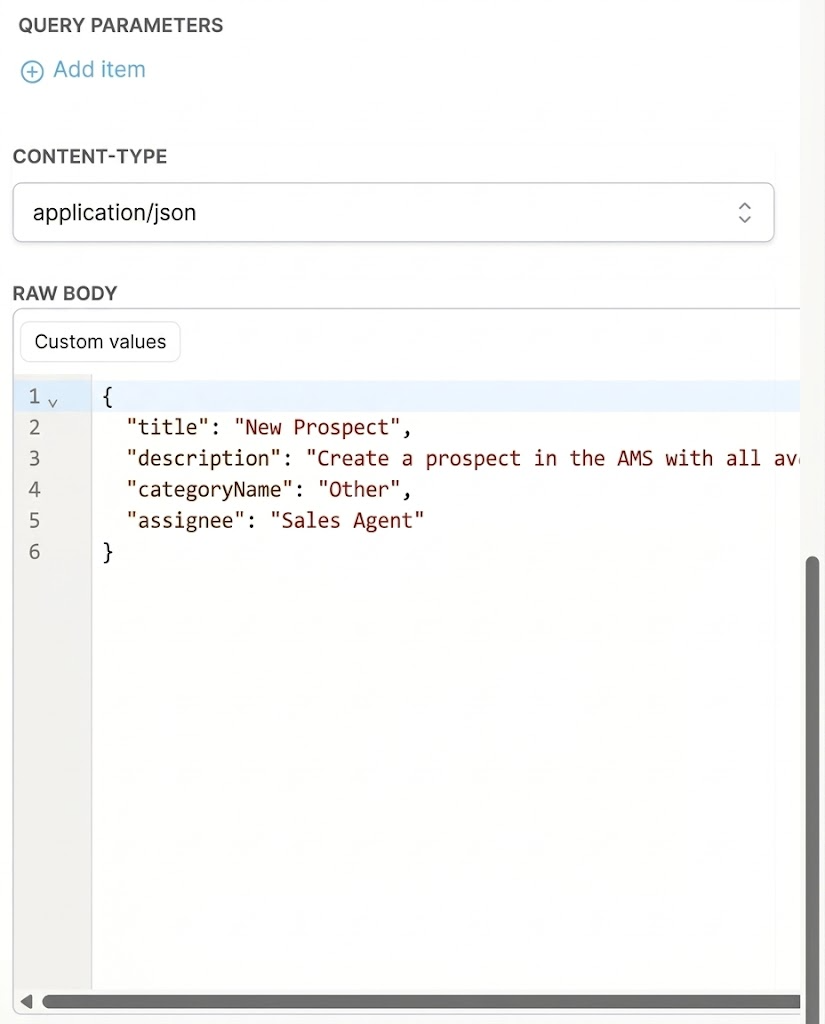
Content-Type and Raw Body.
In this example, the body uses four fields:
title is the title the command will have when it comes in to your Command Center.
description is what the AI is going to work on. Here, it asks the AI to create a prospect in the AMS with all available fields, and it uses the dynamic fields available in Momentum CRM to fill in the information the person just entered in the form.
categoryName is the category the command is assigned to. You can choose any of the categories available in your Command Center. This example uses Other.
The assignee is the digital agent that takes the command. This example uses the Sales Agent, but you can assign it to any of the agents in your Digital Workforce.
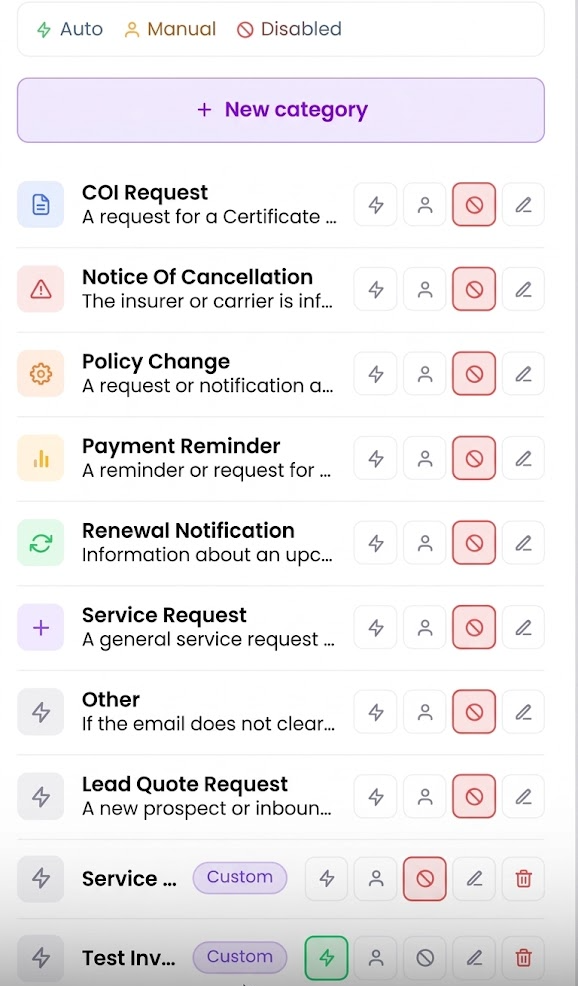
The categories available in the Command Center.
Step 8: Save and test
Click Save action. From now on, whenever someone fills out the form, you'll get a command in your Command Center with that exact information, and the AI will start working on it automatically.
Conclusion
Setting up a webhook for commands comes down to three things: a secret key from the Webhooks page, the URL and header from the same page, and a body that tells the AI what to do. Once the other application sends them, every new submission becomes a command that the AI starts working on right away.
The example uses a form in Momentum CRM, but it applies to any other application that allows webhooks.
Questions? Reach out to your Momentum AMP product contact with anything about InsuranceAgency.ai.
This article reflects the webhook setup as of this writing.
Was this article helpful?
That’s Great!
Thank you for your feedback
Sorry! We couldn't be helpful
Thank you for your feedback
Feedback sent
We appreciate your effort and will try to fix the article