Momentum Email Exchange connects your email directly to Momentum AMP. You can read, reply, and manage your emails, and link them to your insureds, policies, and carriers, without leaving the platform.
What Is It?
Momentum Email Exchange is one of the newest features in Momentum AMP. It connects your email directly to the platform, so your inbox lives right there: everything you've received, and everything you've sent. You can read, reply, and manage your emails without leaving Momentum AMP.
It's also where you link emails to your clients' records. Its tagline says it well: all your emails, synced and ready to attach to insureds and policies.
How This Saves You Time
Your inbox is inside the platform. You read, reply, and manage your emails without leaving Momentum AMP.
When you link an email to an insured, the entire thread is automatically added to the insured's notes in the AMS. The complete conversation ends up in one place.
While you're working on a service request, you can open the email and see the full thread right there, from the same screen.
You can link the email to the right policy, and to a carrier when one is involved.
Inside each email, you can reply or forward, summarize the email with AI, and create a note in the AMS in one click.
A dashboard summarizes your email activity, and your most recent emails always appear first.
With a process label, emails that carry it are saved automatically to the AMS Activity Log under the insured.
Why This Matters
Client communication happens in email, and when those conversations stay in the inbox, it's easy to lose track of them. Linking them to insureds, policies, and carriers puts the complete conversation in one place.
That way, you never lose track of a communication with your client.
How It Works, Step by Step
Step 1: Open Momentum Email Exchange
In Momentum AMP, in the left side panel, open Toolbox and select Momentum Email Exchange.
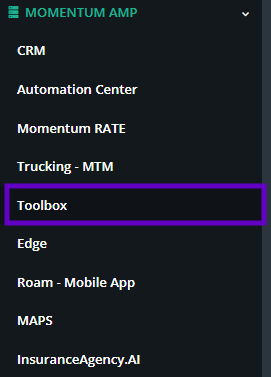
The Momentum AMP menu, with Toolbox.
Step 2: Read the dashboard
At the top, you'll find a dashboard that summarizes all of your email activity. The tiles show your total emails, how many were received and sent, how many are linked to an insured or to a policy, and how many are still unlinked and need linking. A date range at the top right lets you choose the period.

The dashboard tiles and the date range.
Below, a chart shows the emails you received and sent over time. Email Sync Status shows whether your sync is active, how many emails have been processed, and any processing issues, with a link to Settings. The Refresh Now button syncs on demand.

Email activity over time, and the sync status.
Step 3: Use the Inbox and its filters
Open the Inbox. Your most recent emails always appear first. You can filter the list by All, Received, or Sent, by link status, by label, and by time, and you can also search your mail.

The Inbox filters.
The link status filter lets you see whether an email is linked or not. For example, choosing Linked to insured shows only the emails that are already linked to an insured, and the list has a Linked to column to show it.

The Inbox, filtered by Linked to insured.
Step 4: Open an email
One of the most powerful features is linking. Say you're working on a service request: you can open the email and see the full thread right there, from the same screen. Inside each email, you'll see all of its details.
At the top, you can reply or forward directly from here, and summarize the email with AI. You can also create a note in the AMS in one click.

The actions at the top of an email.
Step 5: Link the email to an insured
On the right, the Linked to panel asks you to choose the insured, and optionally a policy, to attach this email to. Select the insured and click Attach.
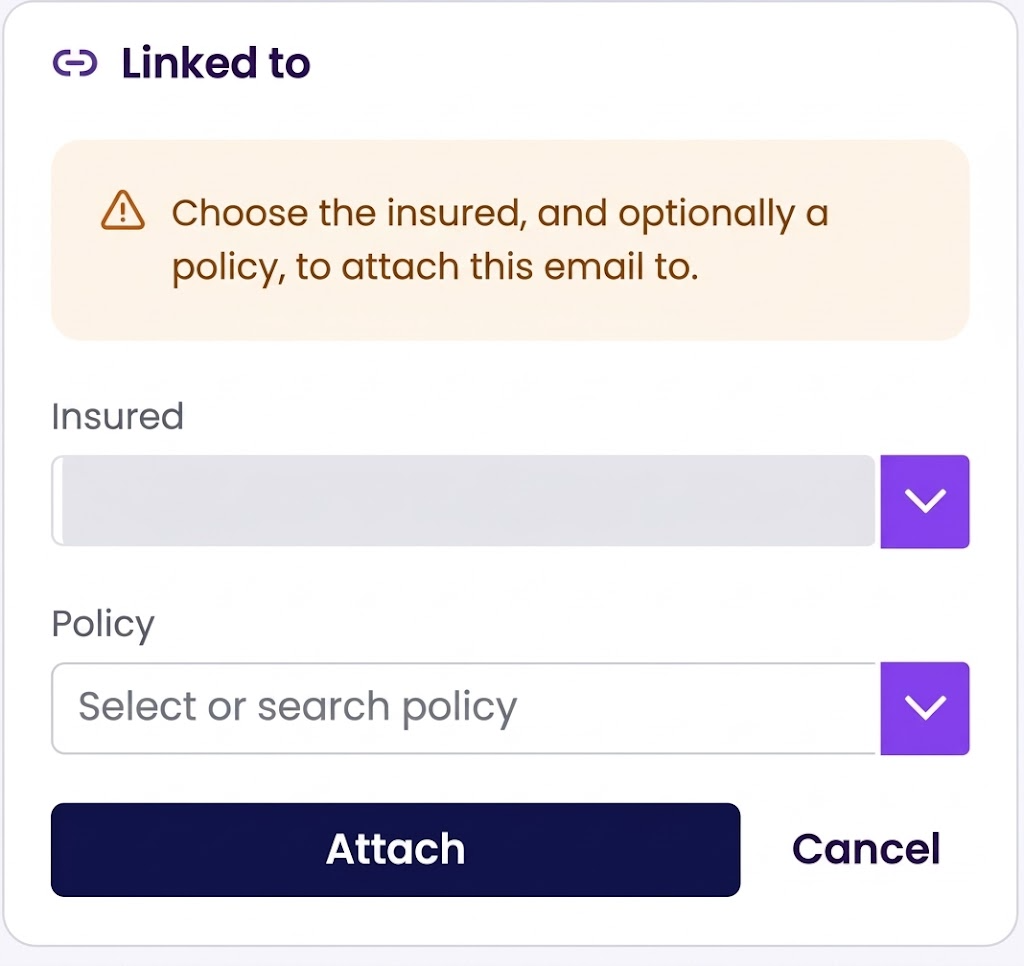
The Linked to panel. The insured's name is hidden.
When you do, the entire thread is automatically added to the insured's notes in the AMS. That means you have the complete conversation in one place.
Step 6: Link the email to a policy
You can also link the email to a policy. Once you select the insured, you'll see all the policies attached to them, and you can choose the right one.
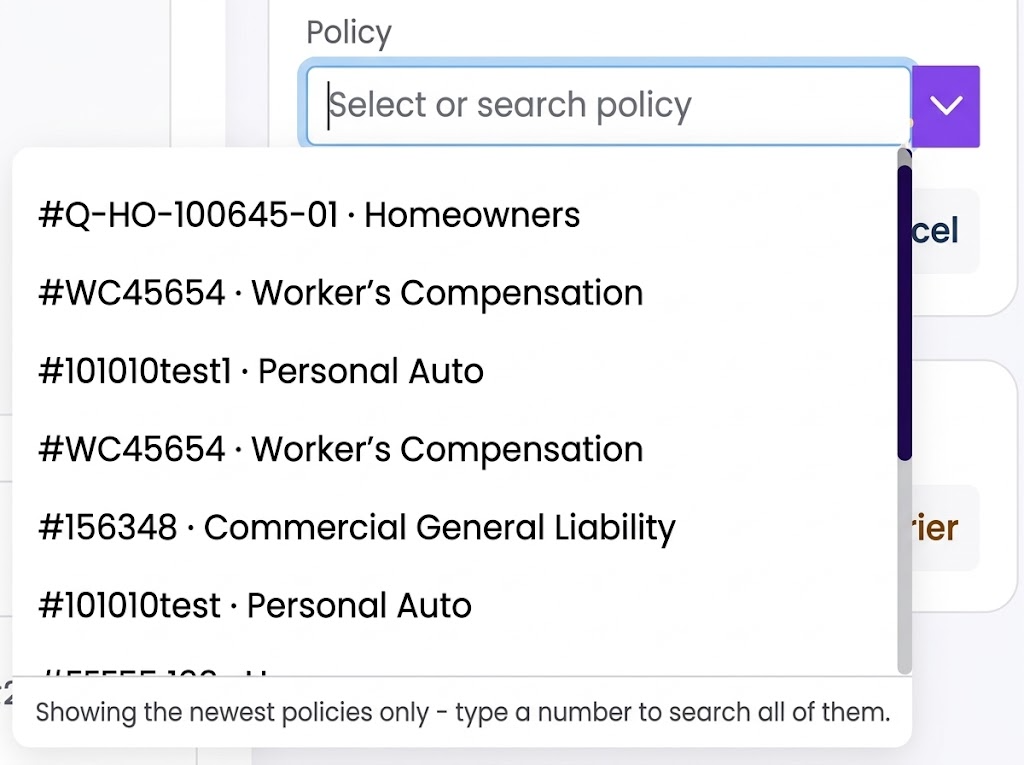
The policies available for the insured.
The list shows the newest policies. To search all of them, type a policy number.
Step 7: Link a carrier
If the email involves a carrier, you can link that as well. Below the Linked to panel, the Carrier panel says No carrier linked until you click Link carrier.
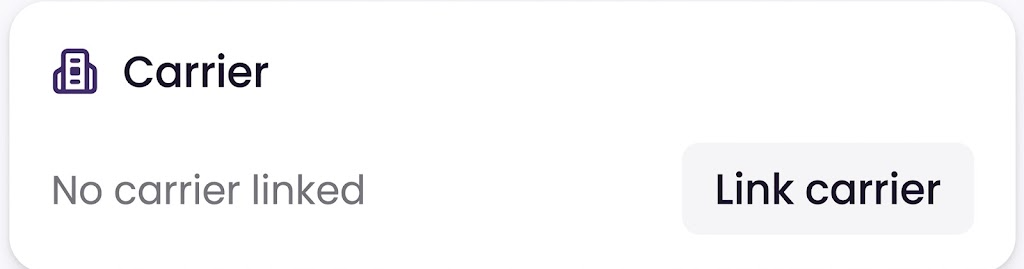
The Carrier panel.
Step 8: Choose the process label
Now, let's take a look at Settings. First, choose the process label. Any email in Gmail or Outlook that carries this label will be saved automatically to the AMS Activity Log, under the insured.

The process label setting.
The setting explains it this way: it decides which emails are stored in the AMS activity log. With a label set, only the emails carrying that label are stored. Leave it empty to store every email. It does not affect command creation.
Step 9: Review your connected email accounts
Next, you'll see the email accounts you've connected. Each one shows its type, its status, and a toggle to turn AI automation on or off for that account. The email addresses are hidden here on purpose.
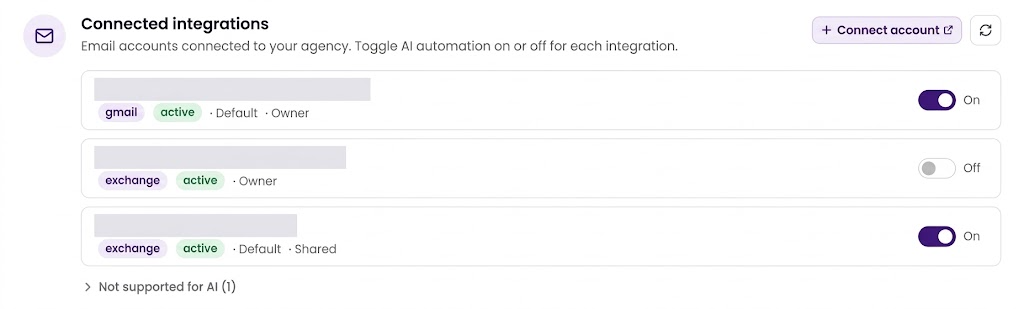
The connected email accounts.
If you need to connect another account, just click Connect account. It will take you to the email integration section in the Automation Center, where you can complete the setup.
On the right, the Integration summary shows how many accounts you have, how many are active, and how many have expired. Shared settings explains that changes made here also apply to InsuranceAgency.ai: connected integrations and email processing settings are shared across both systems.
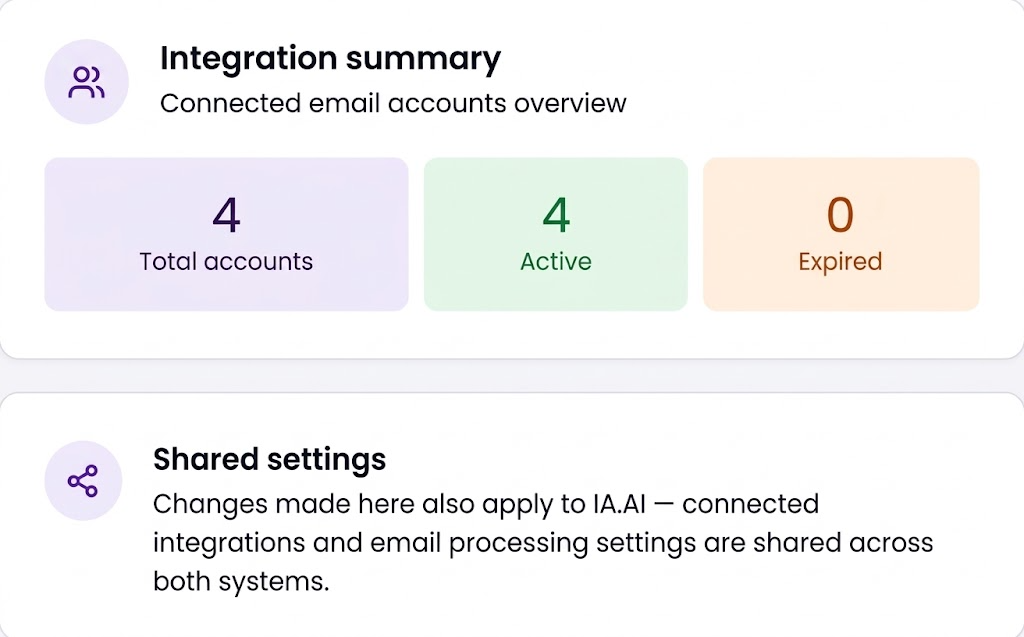
The Integration summary and Shared settings.
Step 10: Check the activity view
Finally, you'll see another option: an activity view showing everything that has been processed, or replied to, from your connected email. It shows everything received recently and what happened to it: whether a command was created, whether it reached the AMS, and if not, why.

The activity view, with its Show activity button.
Conclusion
Momentum Email Exchange puts your inbox inside Momentum AMP and connects it to your insureds, policies, and carriers. Link an email once, and the entire thread lives in the insured's notes, so you have the complete conversation in one place.
The dashboard, the filters, and the activity view help you stay on top of it all. That's the Momentum Email Exchange: your inbox, your insureds, your policies, and your carriers, all connected in one place.
Questions? Reach out to your Momentum AMP product contact with anything about Momentum Email Exchange.
This article reflects Momentum Email Exchange as of this writing.
Was this article helpful?
That’s Great!
Thank you for your feedback
Sorry! We couldn't be helpful
Thank you for your feedback
Feedback sent
We appreciate your effort and will try to fix the article