This article follows a certificate of insurance request from your inbox to a finished certificate. It builds on two other articles: connecting your email, and setting up email categories.
What Is It?
InsuranceAgency.ai can take a certificate of insurance (COI) request that arrives in your email and work on it for you. It starts with a category that grabs all the COI requests you receive in your inbox. Each one becomes a command in the Command Center, an AI agent is assigned to it, and the agent starts working on the request immediately. It takes everything contained in the email and begins working from there.
When it finishes, the agent summarizes what it did and delivers the certificate to whoever you've chosen. In this example, the COI is sent to a reviewer's email, so a person can check it before it goes out.
How This Saves You Time
COI requests are picked up from your inbox on their own. Nobody has to open each email and create the task by hand.
The agent starts working right away, in the background. You can simply let it work.
It reads the whole email and does the work: it finds the insured and the policy, and if the certificate holder doesn't exist in the system yet, it creates it.
You get a summary of what it did, including which insured and which policy it worked on, so there's nothing to retrace.
The certificate comes ready, signed by the agent assigned to the policy, with the information the certificate holder requested and the description of operations.
You decide who receives it. You can have it sent straight out, or sent to you for review first.
Why This Matters
Every certificate request means finding the insured, the policy, and the holder, and then building the certificate. This is a really important time saver for agencies, because the agent does that work while your team focuses on other things.
And you stay in control: you choose whether the certificate goes out directly or reaches you first for review.
How It Works, Step by Step
Step 1: Set up a category for COI requests
It all starts with a category that grabs the COI requests arriving in your email. In the Command Center, under Configuration, the COI Request category is set to Auto, which means the AI acts as soon as a matching email comes in.
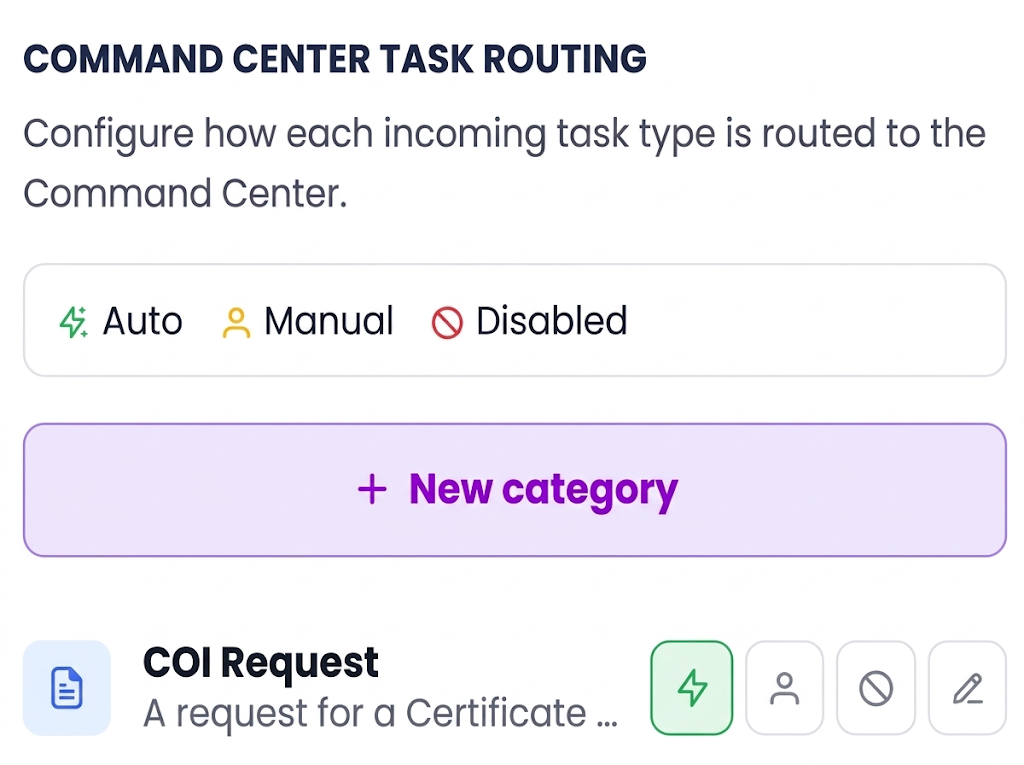
The COI Request category in the Command Center, set to Auto.
Creating and editing categories is covered in the article on setting up email categories with AI. Your email also needs to be connected, which has its own article.
Step 2: A command is created
When a COI request arrives, a command is created in the Command Center. The list shows its type (COI Request), its source (Email), and its status. The Assigned to AI tab counts the commands the AI is handling.

The Command Center, with the new COI Request command.
Step 3: An agent is assigned
Open the command. At the top you'll see its type, its assignee, and its status. An AI agent has been assigned to the request, and it is working on it immediately. The system created the task as soon as the email came in.

The command, with its assigned agent and status.
Step 4: The agent reads the email
The agent takes all that is contained in the email and starts working on it. In this example, the email asks for an ACORD 25 certificate for a general liability policy, and gives the insured's name, the policy number, and the policy term.

The request, as it arrived by email.
Step 5: Let it work in the background
You don't have to do anything. You'll see how the agent performs the task, step by step, and it keeps you posted along the way. In this example, it finds that there is no existing holder, so it creates the certificate holder. Then the agent finishes the request. It's really fast.
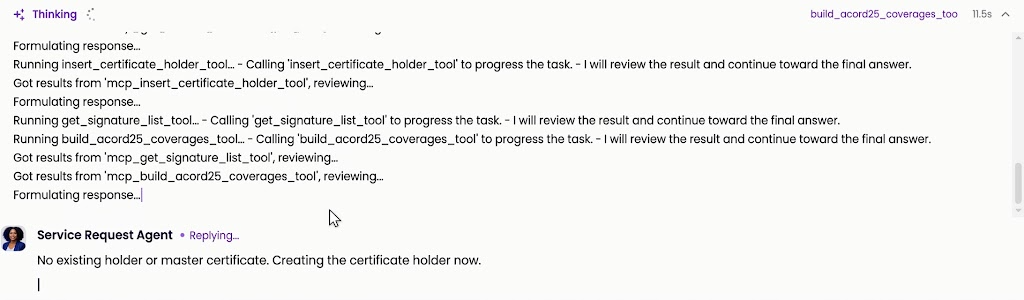
The agent working on the request.
Step 6: Read the summary
When the agent finishes, it summarizes what it did, and tells you what it worked on: this insured, this policy.
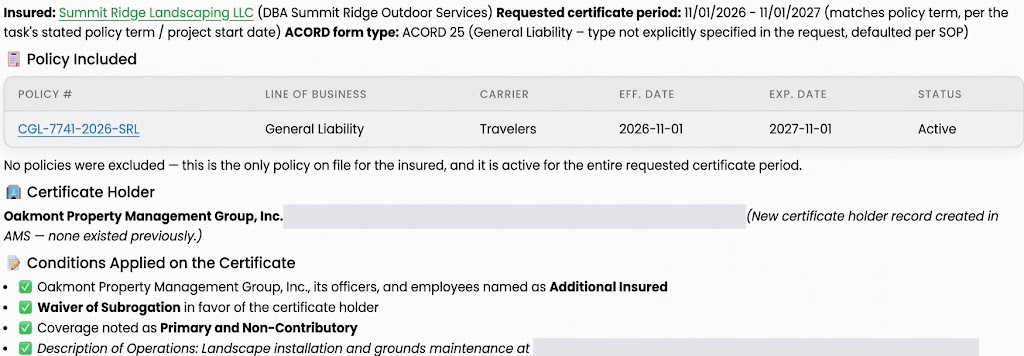
The agent's summary: the insured, the policy, the certificate holder, and the conditions applied.
The summary covers the insured and the certificate period, the form type, the policy included, the certificate holder, and the conditions applied to the certificate, such as additional insured, waiver of subrogation, primary and non-contributory coverage, and the description of operations.
Step 7: Check where the certificate went
The summary ends with the delivery. It shows that the certificate was generated and sent, who received it, and the status of the task.

The delivery details, with the recipient hidden.
In this example, the agent's rules send the COI to the reviewer's email, so it can be reviewed before it goes out. You can configure this as you want. If you want it to send the certificate straight out, it will do it. If not, you can send it to yourself for review, and then send it out.
Step 8: Open the certificate
The certificate arrives by email, created with the information. It's signed by the agent assigned to the policy, and it includes all the information requested by the certificate holder, as well as the description of operations.
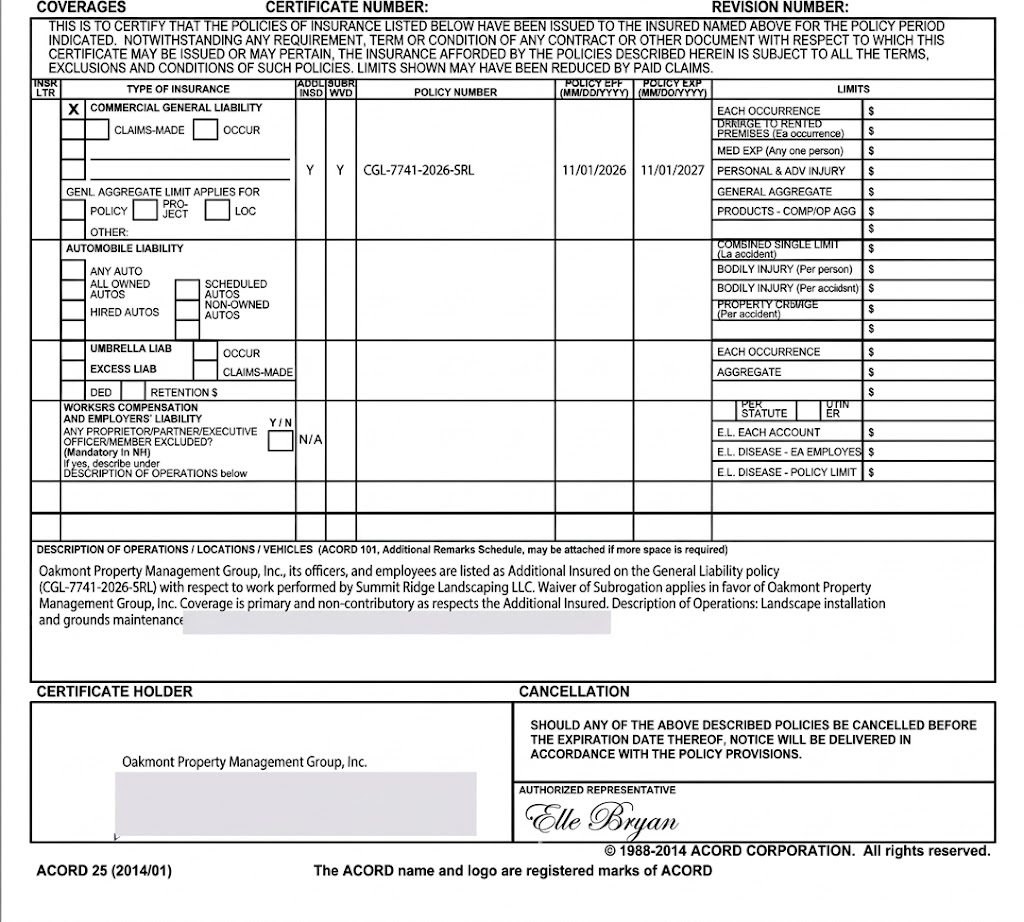
The certificate that the agent created.
Step 9: Refine it by chatting
If you have any questions, or you want to refine a process, all you have to do is go back and forth with the AI right from the command, using the chat bar at the bottom.

The chat bar, at the bottom of the command
Conclusion
A COI request goes from an email in your inbox to a finished certificate waiting for your review, with an AI agent doing the work in the background. You set it up once with a category, decide who receives the certificate, and can refine any step by chatting with the agent.
That's how InsuranceAgency.ai saves you time: it creates the task on your behalf, and does the work.
Questions? Reach out to your Momentum AMP product contact with anything about InsuranceAgency.ai.
This article reflects the certificate of insurance workflow as of this writing.
Was this article helpful?
That’s Great!
Thank you for your feedback
Sorry! We couldn't be helpful
Thank you for your feedback
Feedback sent
We appreciate your effort and will try to fix the article