What Is It?
Email Categories is a configuration feature inside InsuranceAgency.ai's Command Center. Once your email is connected under Connected Apps, incoming emails stop sitting only in your inbox: they start flowing into the Command Center as well, where the AI treats each one as a command or task it can act on.
Categories are the layer that makes that possible. Each category defines one recognizable type of email, for example a Certificate of Insurance request, a policy change, or a payment reminder, and tells the AI two things: how to recognize an incoming email as belonging to that category, and what to actually do once it's recognized.
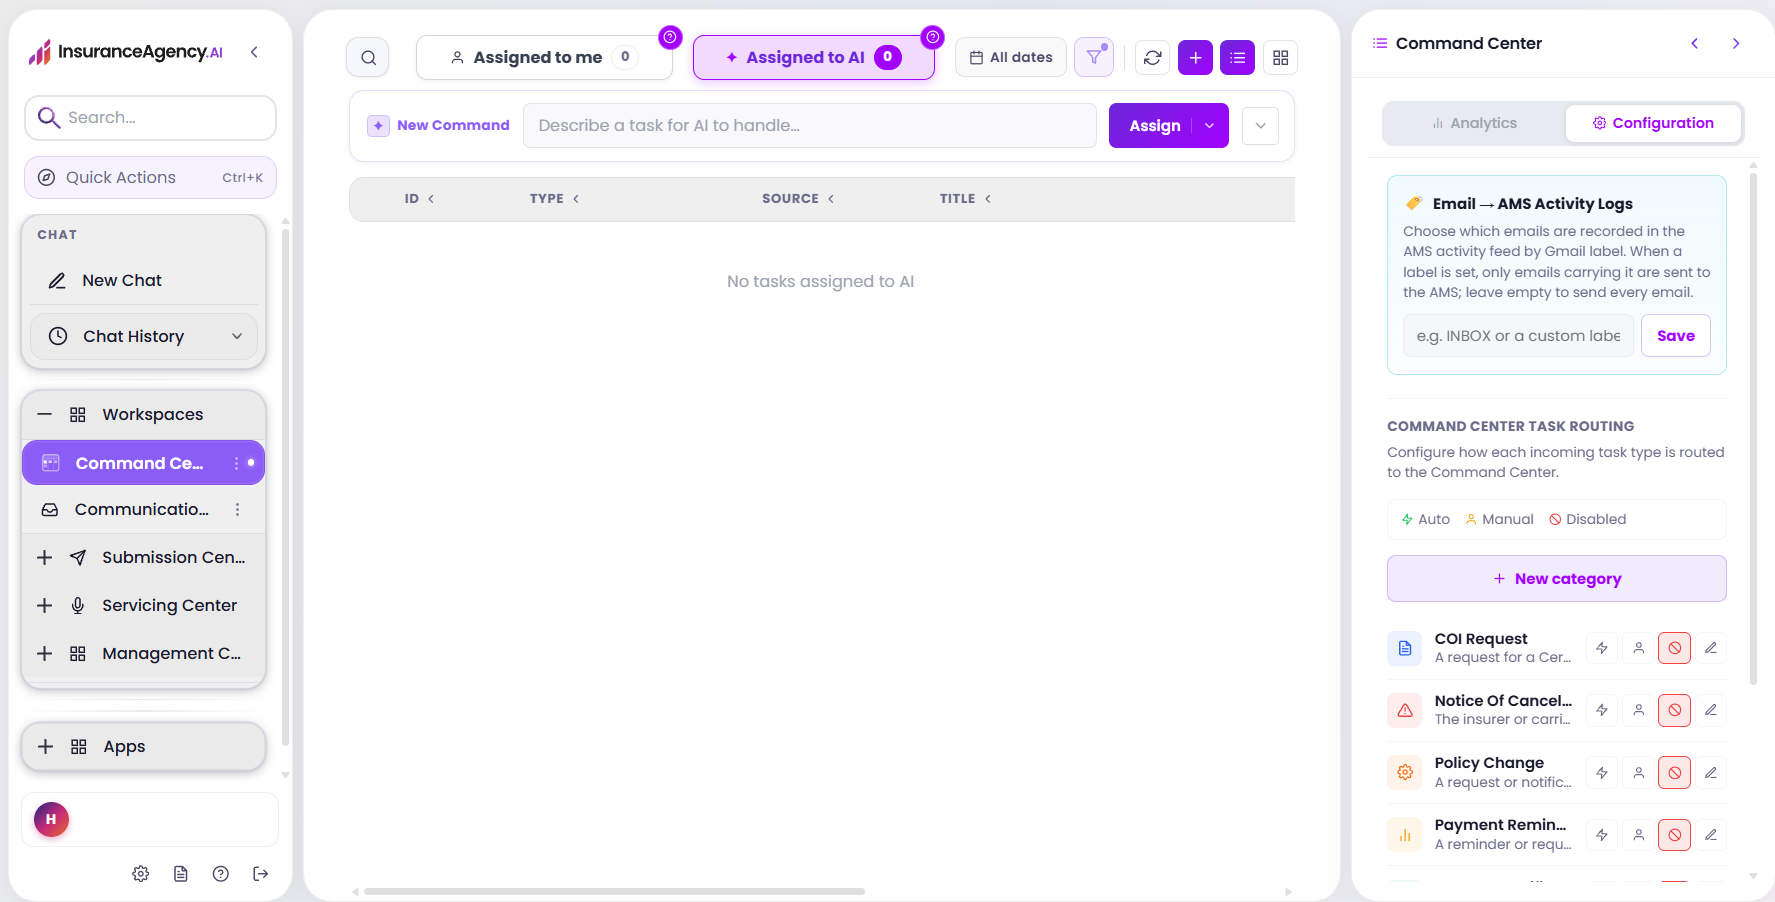
Command Center, under Configuration: the existing categories, each with its own routing controls.
A handful of categories come already configured: COI Request, Notice Of Cancellation, Policy Change, Payment Reminder, Renewal Notification, Service Request, Other, and Lead Quote Request. Each one lists a short description of what it's for, and you can edit any of them, build new ones from scratch, or turn individual ones off if you're not ready to use them yet.
How This Saves You Time
Without categories, every incoming email still needs a person to open it, figure out what it actually is, decide who or what should handle it, and either act on it or forward it along. That reading-and-routing work happens on every single email, regardless of how routine or repetitive the request is.
Recognition is automatic: the AI matches incoming emails against your categories using either an exact label or a written description you provide, instead of a person eyeballing the subject line and sender.
Each category hands off to a specific AI agent built for that kind of task, so a Policy Change and a Service Request aren't funneled through the same generic process; the agent working the task is the one set up for it.
A category can be set to auto-run, meaning the moment a matching email arrives, the AI acts on it immediately, with nobody needing to open the email first.
An optional completion label gets applied automatically in Gmail or Outlook once the AI finishes the task, so you can see what's done directly in the inbox your team already checks, without logging into a separate system to confirm it.
Put together, this removes two separate categories of manual work: the triage of figuring out what an email is, and the follow-up of tracking whether it got handled.
Why This Matters
Every day, an agency's inbox fills up with the same handful of request types, arriving in no particular order, mixed in with everything else. A renewal notification sits next to a lead quote request sits next to a cancellation notice. Someone has to open each one, figure out what it actually is, and decide what happens next, before anything can even begin to move.
That sorting step is exactly what breaks without Categories. An AI agent can be excellent at handling a Certificate of Insurance request or a payment reminder, but only once it knows that's what it's looking at. Categories are the only thing that turns "an email showed up" into "this is a COI Request, hand it to this agent, using these instructions." Without that translation step, the AI agents sitting behind the scenes have nothing to act on, no matter how capable they are.
The eight categories that come built in already, COI Request, Notice Of Cancellation, Policy Change, Payment Reminder, Renewal Notification, Service Request, Other, and Lead Quote Request, aren't arbitrary. They're the recognizable shape of what actually lands in an agency's inbox on any given day. Miss one of these silently, and it's not a system error, it's a renewal nobody followed up on, or a cancellation notice that sat unread for a week. Categories exist so those exact situations get caught and routed the moment they arrive, not whenever someone happens to open that particular email.
How It Works, Step by Step
Step 1: Open the Command Center
In InsuranceAgency.ai, go to Workspaces in the left sidebar and select Command Center.
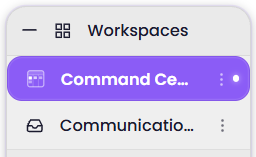
Workspaces in the left sidebar, with Command Center selected.
Command Center opens on the Analytics view by default. You'll need to switch to the Configuration tab (next to Analytics, top right of the panel) to actually manage categories; Analytics is just reporting and won't let you create or edit anything.
Step 2: Review your existing categories
Under Command Center Task Routing, in Configuration, you'll see every category already set up for your agency, each with a short description underneath its name so you can tell at a glance what it's meant to catch. This is also where you'll find the New Category button, and where every category you create will show up afterward.
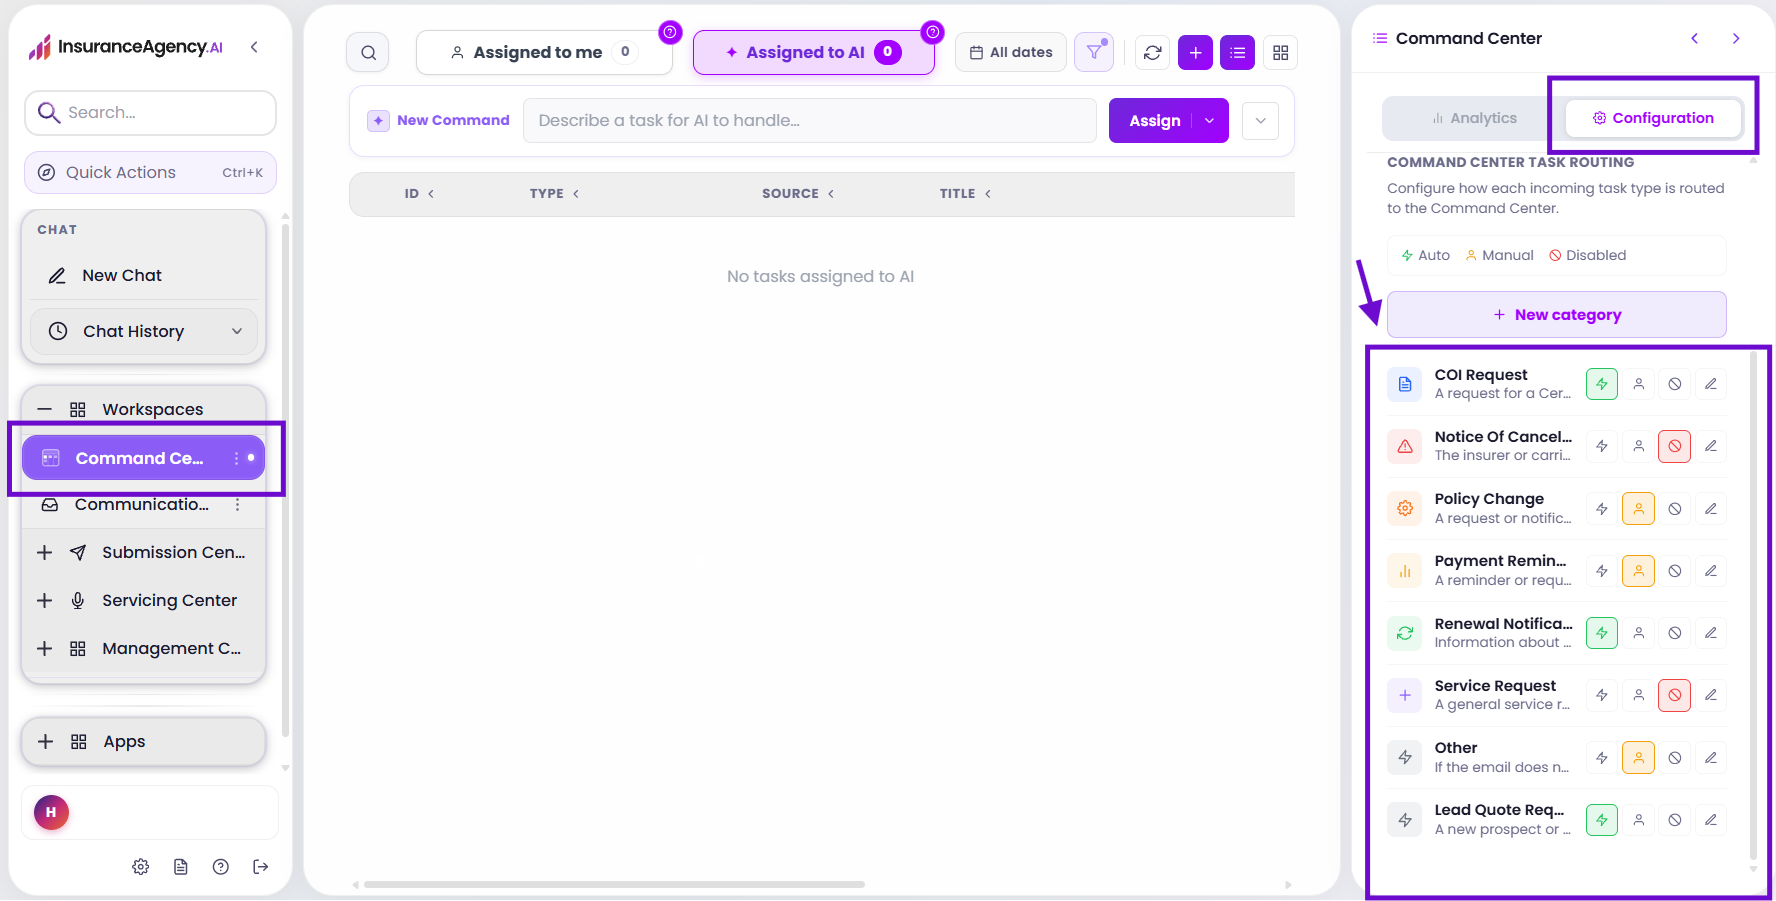
Step 3: Click New Category
The button sits just above the existing category list.
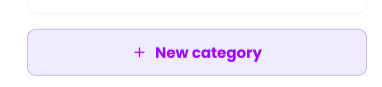
The New Category button, above the existing list.
Clicking it opens the New SOP category window, where the rest of the setup happens in one place: name, trigger, completion label, assignee, and execution prompt.
Step 4: Name the category and choose how it triggers
Start with Category Name, something specific enough that you and your team recognize it later in the list. Then choose Trigger On.
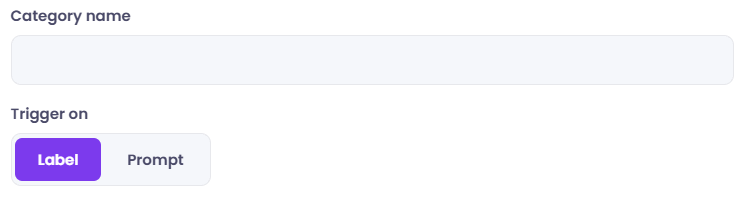
Category name field, and the Label / Prompt toggle underneath it.
If you choose Label, a field appears where you type the exact tag to match (matching has to be exact, so consistency in how your team tags matters here). If you choose Prompt instead, you'll fill in Identification Prompt, describing in plain language how the AI should tell that an incoming email belongs to this category. The more specific this description is, the less likely the AI is to confuse it with a similar category.
Step 5: Add a completion label (optional)
This one isn't required. If you want a way to visually confirm a task is done without opening InsuranceAgency.ai, set a Completion Label here.
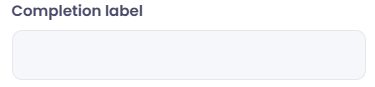
The Completion Label field, left empty unless you want automatic tagging on completion.
Once the AI finishes working a task in this category, it applies this label automatically to the original email in Gmail or Outlook, the same way a person would tag it manually, except it happens without anyone touching it.
Step 6: Choose the Assignee
Open the Assignee dropdown and pick which agent should handle tasks that fall into this category.
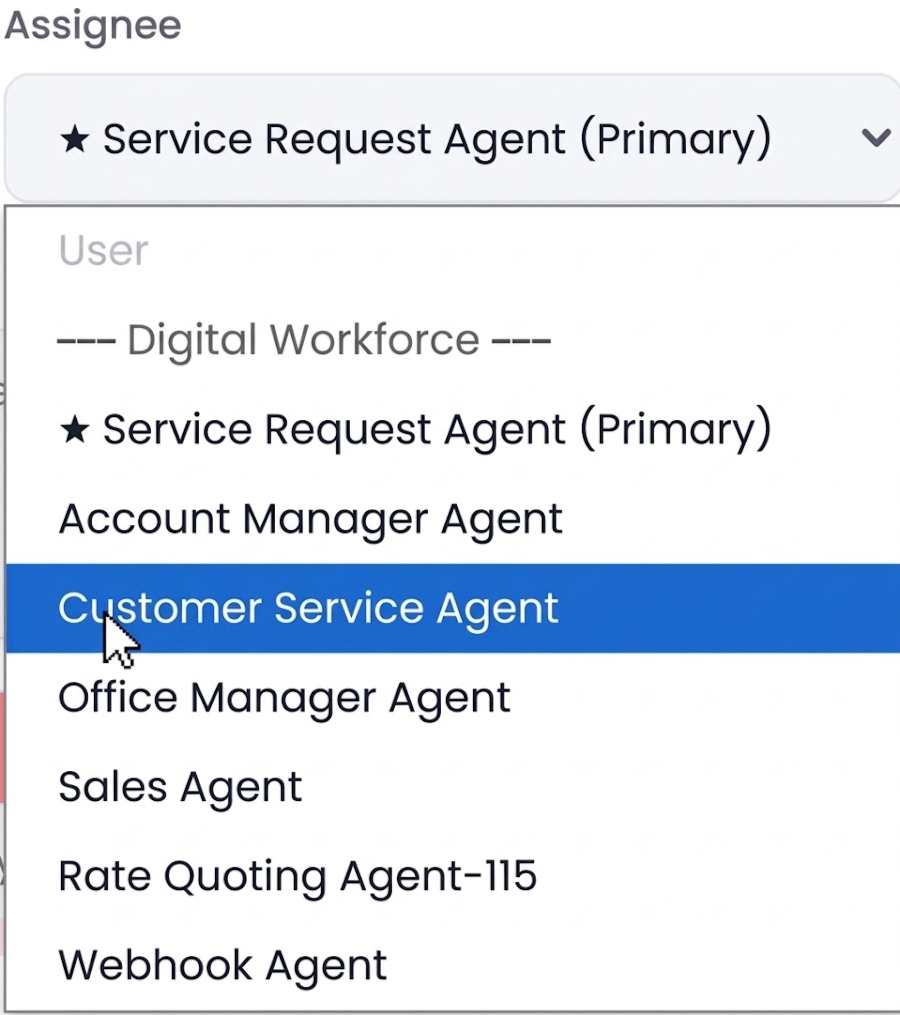
Assignee dropdown open, showing all seven Digital Workforce agents.
The list is split into User (assigning it to a person instead of AI) and Digital Workforce (the seven built-in AI agents, plus any custom agents your agency has added). Picking the agent that matches the work, rather than leaving it on a default, is what keeps each category's output specialized instead of generic.
Step 7: Set the Execution Prompt
This is where you tell the AI exactly what to do once a category applies.
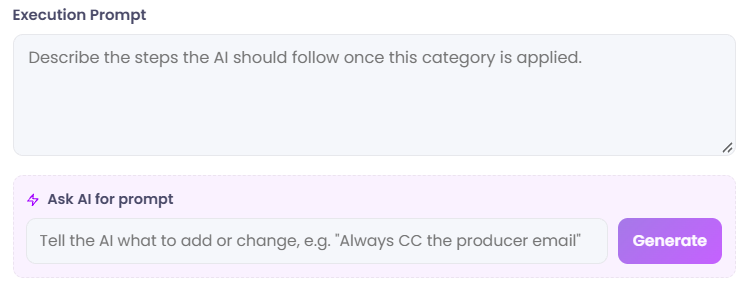
Execution Prompt field, with the Ask AI For Prompt box and Generate button below it.
You can type the full Execution Prompt yourself, or, faster, describe what you want in your own words in the Ask AI For Prompt box (the placeholder example shown is Always CC the producer email) and click Generate. The AI writes out the complete, properly structured execution prompt into the field above for you, which then becomes what the assigned agent actually follows.
Step 8: Click Create Category
Once the name, trigger, assignee, and execution prompt are filled in, save it.
The Create Category button, at the bottom of the window.
The new category appears immediately in your list back on the Configuration screen, right alongside the default ones, and starts working the next time a matching email comes in (assuming it's not left in a disabled state, covered in the next step).
Step 9: Control how each category behaves
Every category in the list, including the ones you just built, has four controls next to it, in this order: auto-run, human approval, disabled, and edit.
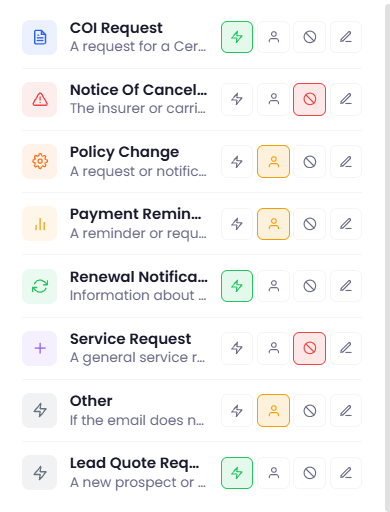
The four controls on each category: auto-run, waiting for human approval, disabled, and edit.
The lightning bolt, highlighted green when active, sets the category to auto-run: the assigned agent acts the moment a matching email comes in, with no review step.
The person icon sets it to wait for human approval instead: a matching task still gets created and assigned, but a person has to review and approve it before the agent proceeds.
The crossed-out circle disables the category entirely. Matching emails won't be picked up at all until you turn it back on.
The pencil reopens the category for editing, returning you to the same fields from Steps 4 through 7, including the identification prompt, assignee, and execution prompt.
Conclusion
Email Categories turns an inbox full of mixed, unsorted requests into something the AI can actually work through on its own: each incoming email gets recognized against a category, handed to the agent built for that kind of task, and worked according to instructions your agency defined ahead of time, not improvised in the moment.
Setting one up is a single pass through one window: a name, a way to recognize it (label or prompt), an agent to assign it to, and execution instructions you can write yourself or have the AI draft from a short description. From there, the four per-category controls let you decide, individually, how much supervision each type of request still needs, so routine categories can run untouched while anything higher-stakes keeps a human in the loop.
Questions? Reach out to your Momentum AMP product contact with anything about InsuranceAgency.ai.
This article reflects Email Categories' configuration and workflow as of this writing.
Was this article helpful?
That’s Great!
Thank you for your feedback
Sorry! We couldn't be helpful
Thank you for your feedback
Feedback sent
We appreciate your effort and will try to fix the article