When a policy is financed using a premium finance company (PFC), the agency typically collects a down payment and the remainder is paid directly to the carrier or MGA by the finance company. Momentum AMS provides tools to properly record this transaction, generate receivables/payables, and issue an invoice for the down payment.
Follow this guide to ensure the billing process is set up accurately and reflects the terms of the Premium Finance Agreement (PFA).
When to Use This
Use Agency Bill – With Outside Financing when:
A Premium Finance Agreement (PFA) has been executed between the insured and a finance company.
The agency collects only the down payment, not the full premium.
The finance company pays the remaining balance directly to the carrier or MGA.
This workflow keeps agency and finance transactions separated while maintaining full accounting accuracy
System Workflow
When this billing type is selected, Momentum AMS automatically:
Creates Receivables for the down payment owed to the agency.
Creates Payables for the total premium owed to the MGA/carrier.
Calculates Agency and Agent Commissions based on rules.
Records all applicable fees and taxes (from templates or manual entry).
The result is a complete billing record reflecting both the agency’s portion (down payment) and the financed portion.
Step 1: Locate the Policy
Use the global search bar to find the insured.
Select the appropriate policy that requires billing.
This process is typically done immediately after binding or renewing a policy.
Step 2: Add the Finance Company
From the General Information tab of the policy, locate the Finance Company field.
If blank, choose the finance company (e.g., U.S. Premium Finance) from the dropdown list.
Click Save Changes to update the record.
Step 3: Access the Billing Menu
Navigate to the Billing tab of the policy.
Select the Endorsement that corresponds to the current term (e.g., renewal endorsement).
Click Edit Endorsement to enter premium and fee details.
Step 4: Enter Premium and Apply Fees
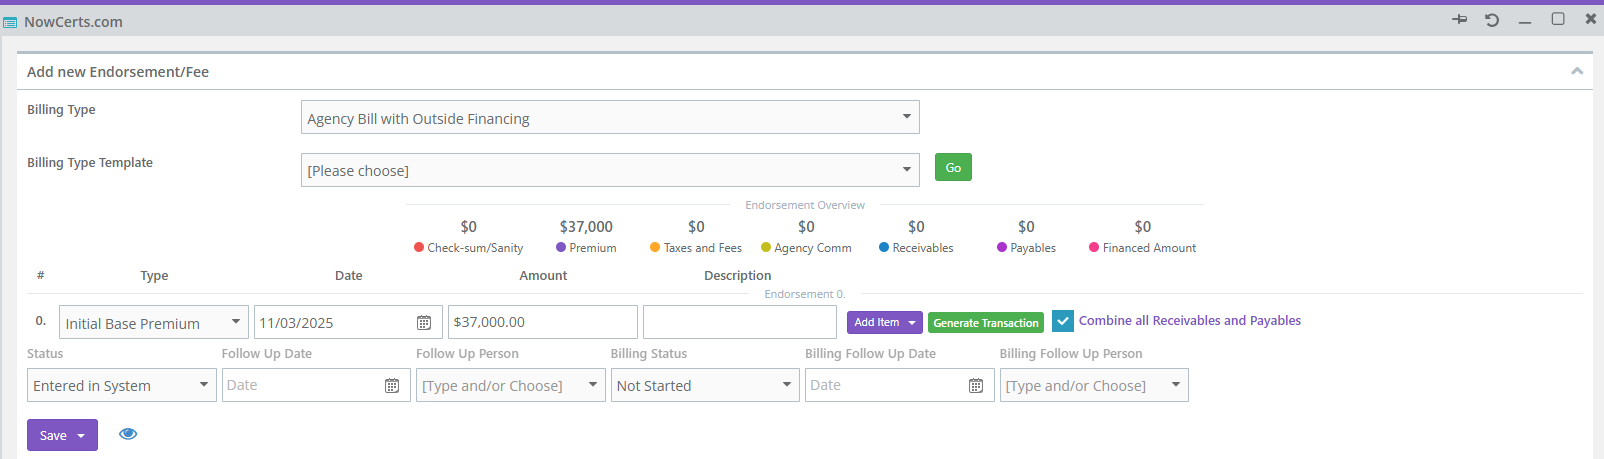
In the billing screen, enter the full premium amount (e.g., $37,000).
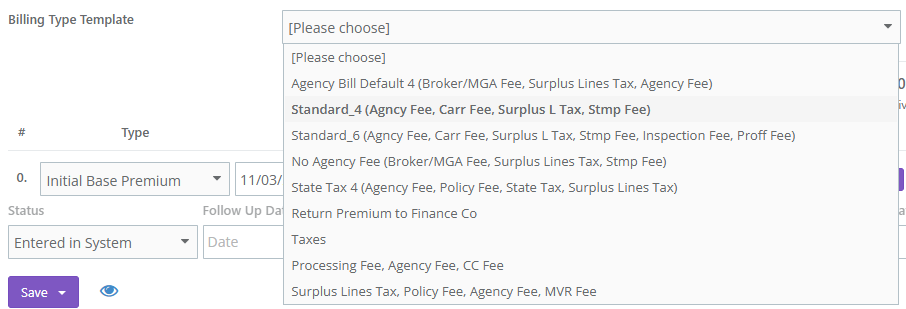
If your agency uses a Billing Template, apply it to automatically add standard fees (Agency Fee, Carrier Fee, Surplus Lines Tax, Stamping Fee, etc.).
Add any additional manual fees or taxes if required.
Verify that the total matches the premium stated in the PFA.
Step 5: Set Billing Type
Under Billing Type, select Agency Bill – With Outside Financing.

Once you finish adding charges, uncheck the billing template box.
Save your progress before generating transactions.
Step 6: Generate Transactions
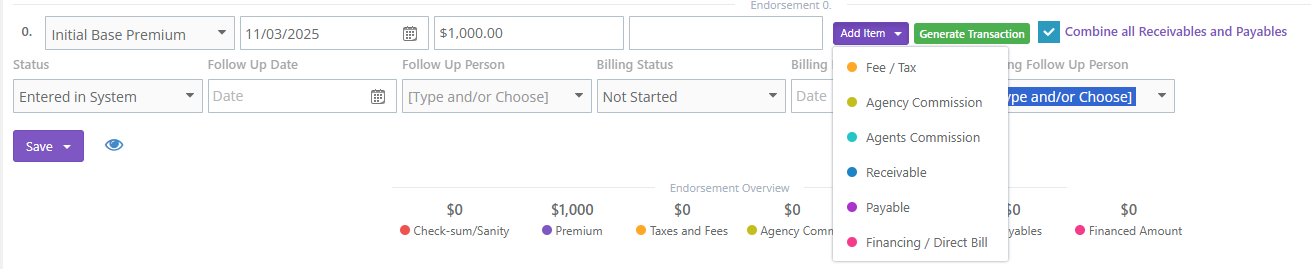
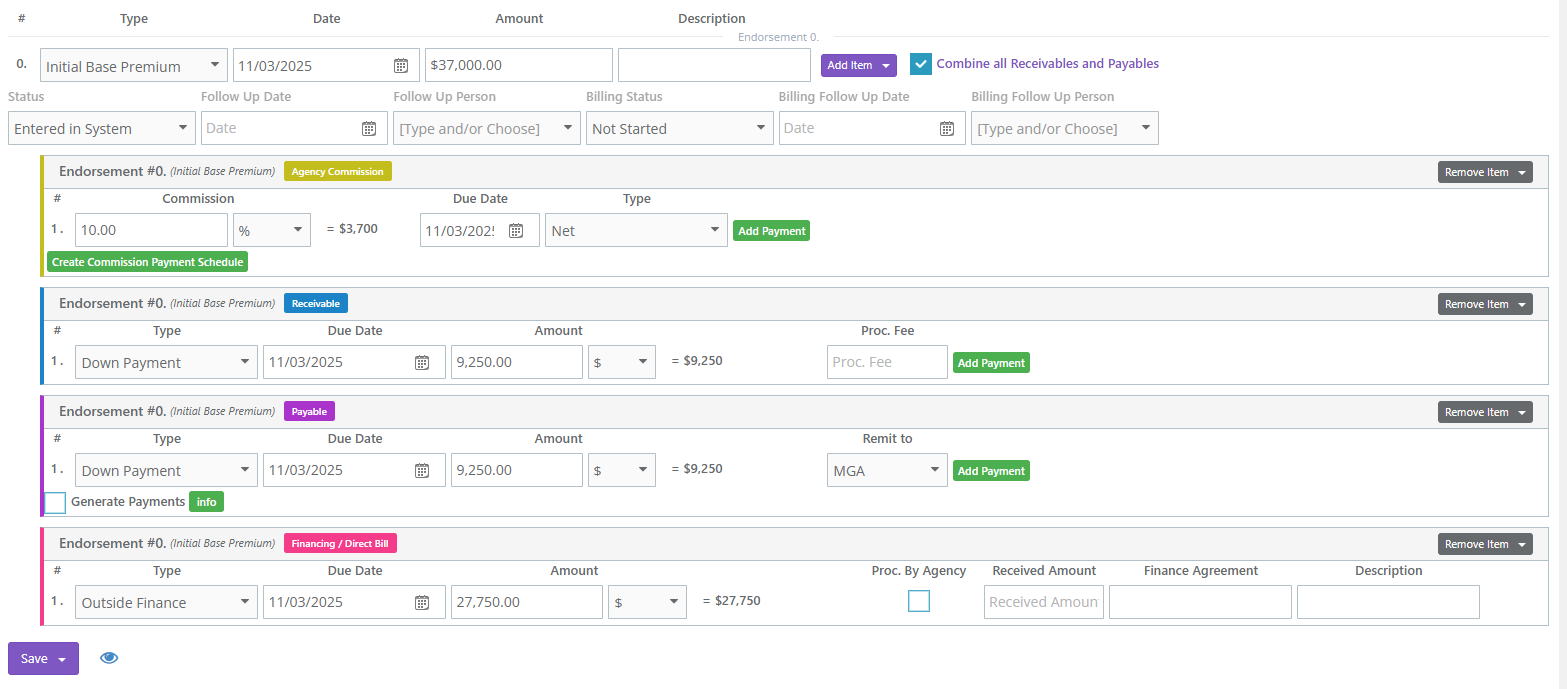
Click Generate Transaction. This will automatically create:
Receivables for the down payment portion owed to the agency.
Payables for the carrier’s total premium amount.
Financing/Direct Bill for the amount that is financed
Agency and Agent Commissions based on the rules in place.
Additional Fee Revenue if applicable.
Step 7: Verify Financial Balances
Before continuing:
Review the commission percentages to confirm they are correct.
Confirm the checksum = 0 — this indicates that debits and credits are balanced.
If the checksum is not zero, review all line items and fees for discrepancies.
Step 8: Adjust Down Payment and Financing Amounts
Adjust the Receivable to reflect the insured’s down payment (e.g., $6,000).
Adjust the Financing Amount to match the balance financed by the PFC (e.g., $30,000).
The Total Premium must equal the total of Receivable + Financing.
Reference the signed Premium Finance Agreement (PFA) for accuracy.
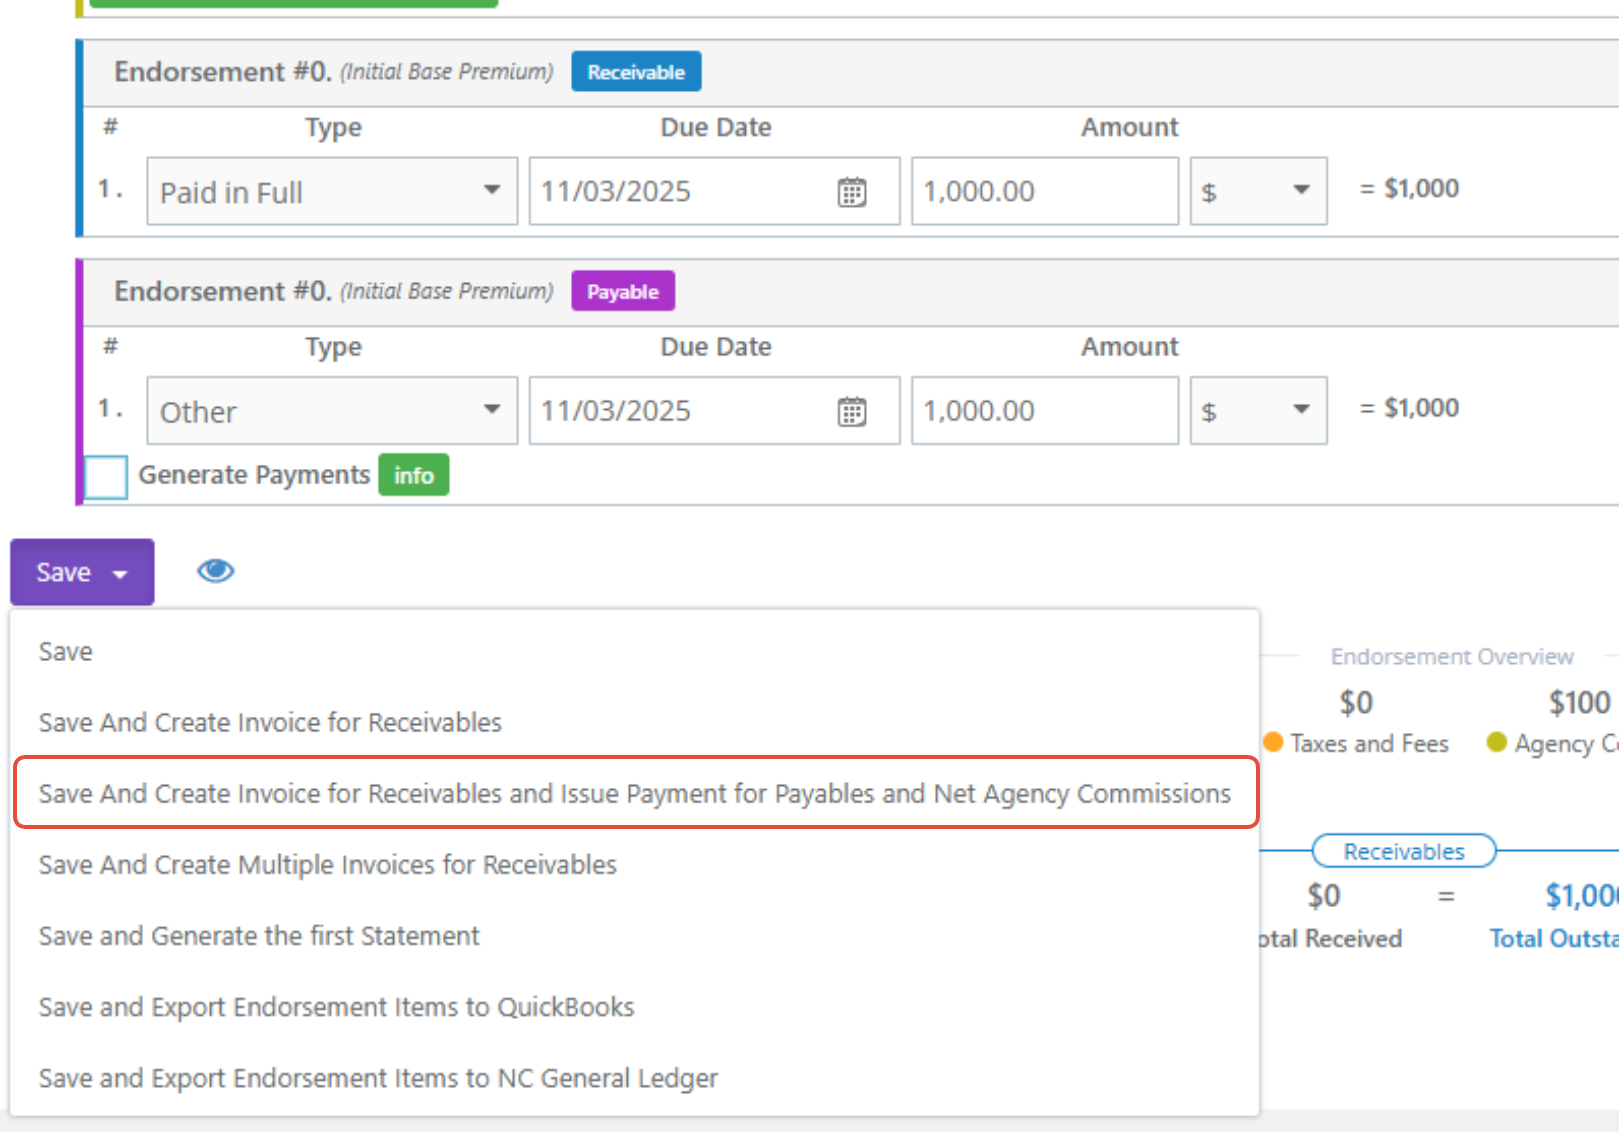
Step 9: Save & Create Invoice
Once the transaction has been generated:
Click Save And Create Invoice for Receivables and Issue Payment for Payables and Net Agency Commissions – this will create the invoice for the insured under Documents → Invoices/Receipts.
This will also create the Issue Payment for the Agency under Documents → Issue Payments.
- This action automatically generates the Invoice and Payment Record in the Documents section for tracking and reconciliation.
- At this point, the agency has a record of both:
- The Invoice to collect funds from the insured, and
- The Issued Payment to the carrier or MGA once funds are received.
Step 10 (Optional): Prepare Payable to MGA
After receiving the insured’s payment, navigate to the Issue Payment in the Documents Tab.
Select Issue Payment you can manually record the payment by opening the Issue Payment and click "Make a Payment" to the MGA or carrier.
Once payment is issued, the payable will automatically update to Paid.
Step 11 (Optional): Finance Funds Sent to Agency
If the finance company sends the full premium to the agency instead of the MGA:
When generating the transaction, check the box: Proc. By Agency

This will create a second set of receivables/payables to track the inflow and outflow of financed funds.
Record the payment received from the finance company, then issue payment to the carrier/MGA accordingly.
⚠️ This scenario is uncommon. In most cases, the finance company remits the funds directly to the MGA or carrier.
Best Practices
✅ Always enter amounts exactly as listed in the Premium Finance Agreement (PFA).
✅ Use Billing Templates for consistent fee and tax setup.
✅ Confirm the checksum = 0 before saving.
✅ Upload the signed PFA to the Documents tab for recordkeeping and compliance.
✅ If the finance company remits funds to the agency, record both the Receipt and Issue Payment transactions to balance cash flow.
Summary
The Agency Bill – With Outside Financing billing workflow ensures accurate tracking of agency-collected down payments and premium finance activity.
Momentum AMS automates the creation of receivables, payables, and commission entries, while maintaining a complete audit trail of how funds move between the insured, finance company, and carrier/MGA.
This approach ensures transparency, compliance, and clear documentation of all billing-related activity within the policy record.
Was this article helpful?
That’s Great!
Thank you for your feedback
Sorry! We couldn't be helpful
Thank you for your feedback
Feedback sent
We appreciate your effort and will try to fix the article