
Tags help you organize your insureds and prospects in a way that makes sense for your agency. They are like labels you can assign to clients, making it easier to find and manage information. Here’s how you can create and use tags in Momentum AMS.
How to Create and Customize Tags:
-
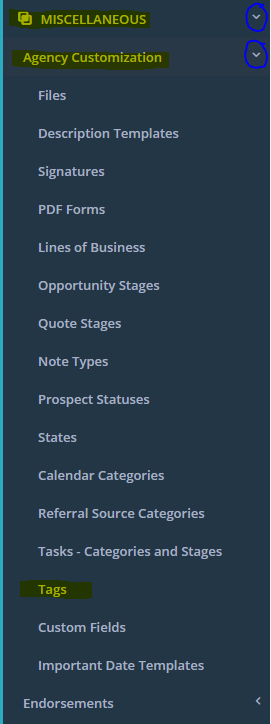
Go to Agency Customization:
- In the main navigation menu, find "MISCELLANEOUS," then click on "Agency Customization."
- Click on "Tags" from the options.
Add a New Tag Category:
- Click the Green "+ADD" button. It’s located just below the agency menu or the "+ADD NEW" button to the right of the Tag Categories List.
- Give your new tag category a name and add the specific tags you want under that category.
- You can also assign a color to each tag to make them easy to recognize.

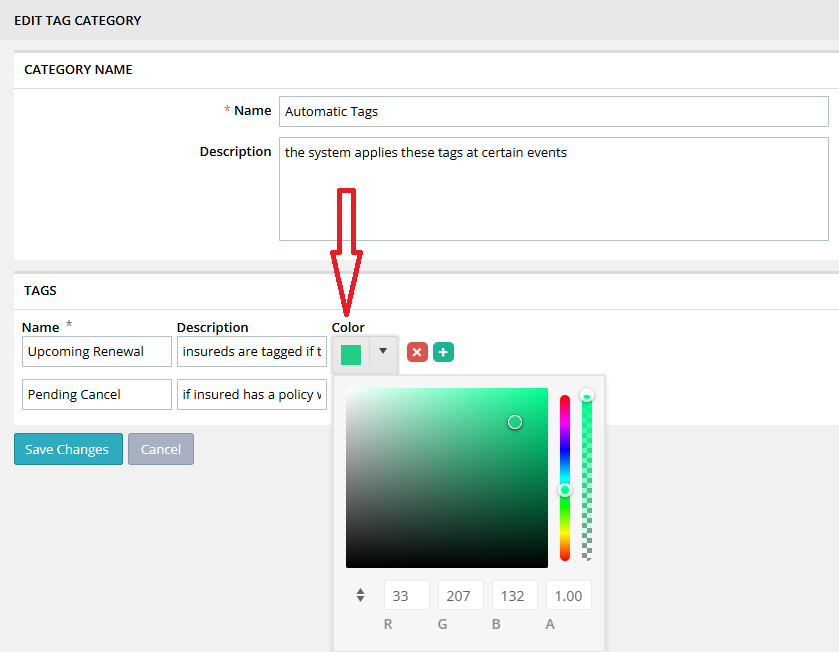
Save Your Tags:
- After setting everything up, click the blue "Update" button to save your new tags.
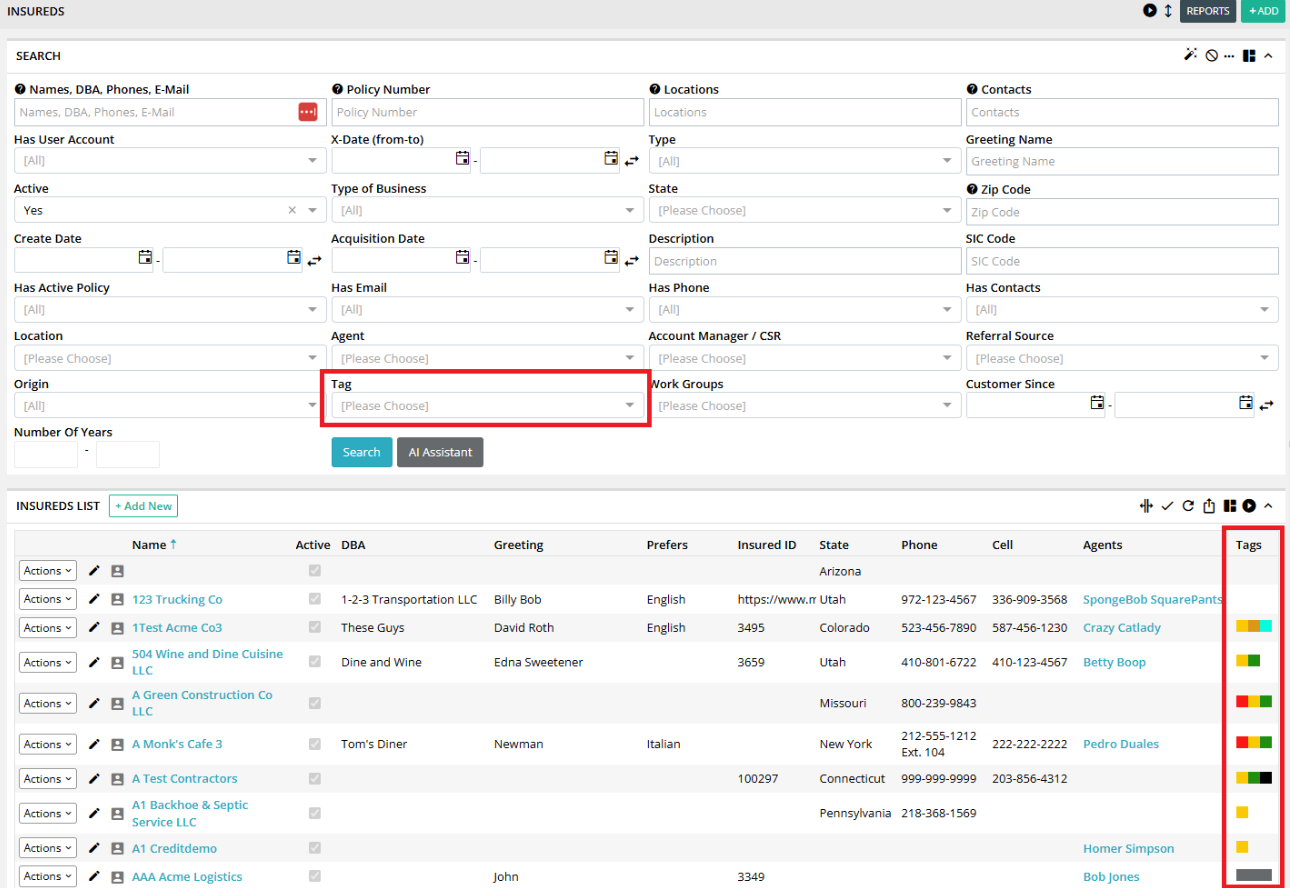
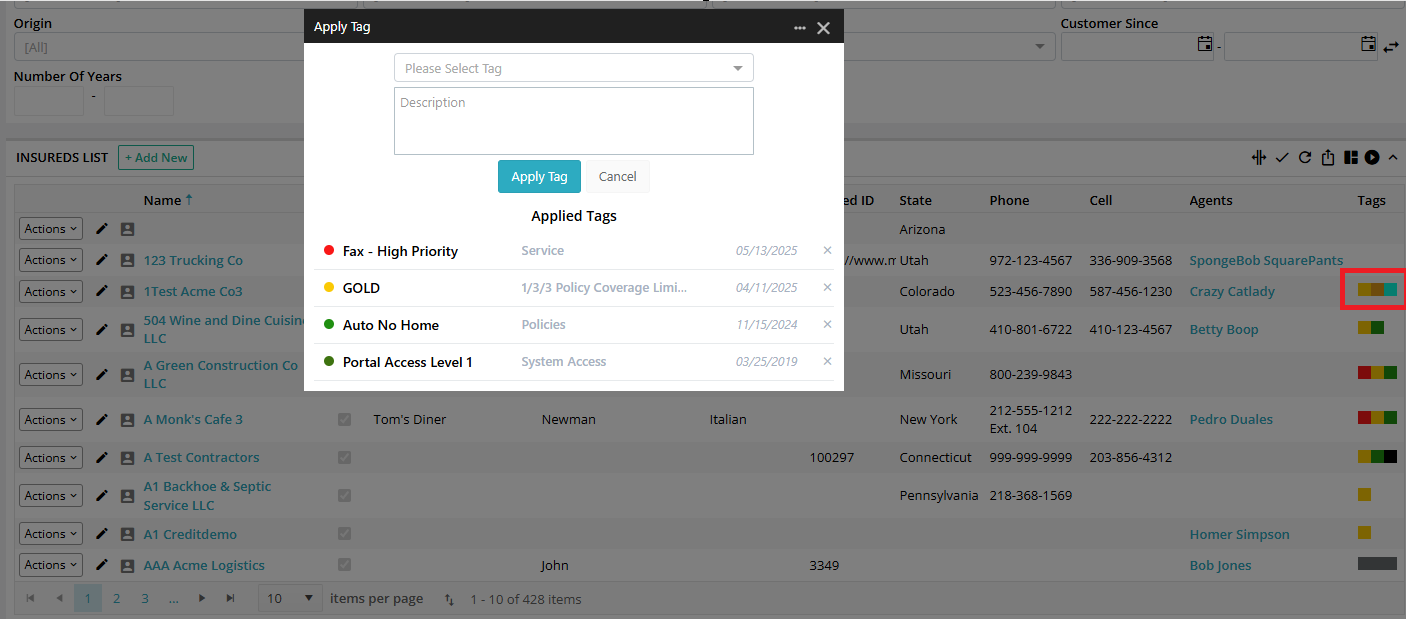
From the Insureds Page:
- Go to the "Insureds" page.
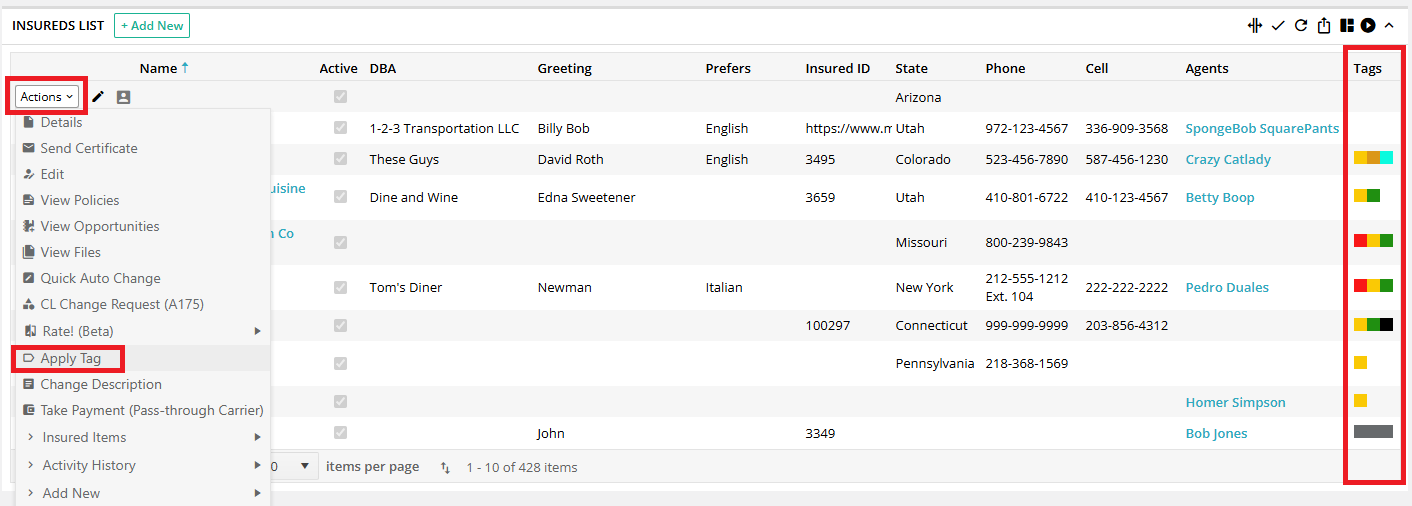
- Find the insured you want to tag, then click the blue "Actions" button next to their name.
- Select "Apply Tag." You can also click "View" in the "Tags" column to see or add tags.
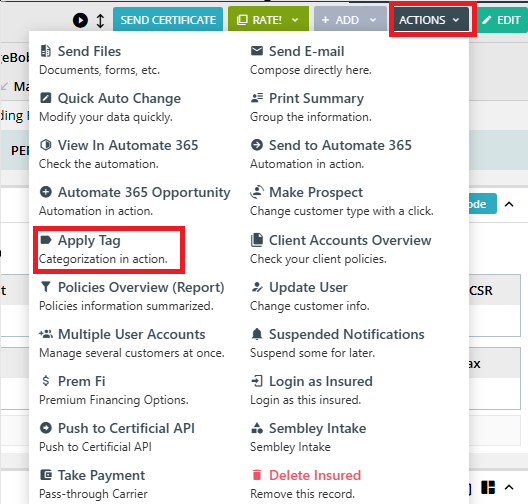
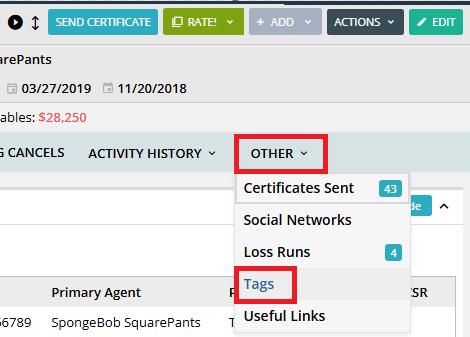
From the Insured's Details Page:
- You can also apply tags from the insured’s "Details" page.
- Click the"ACTIONS" button or go to the "Other" tab to manage tags.
If you prefer a video: